Category Archives: travel

Bikepacking Munich To Venice via The Dolomites

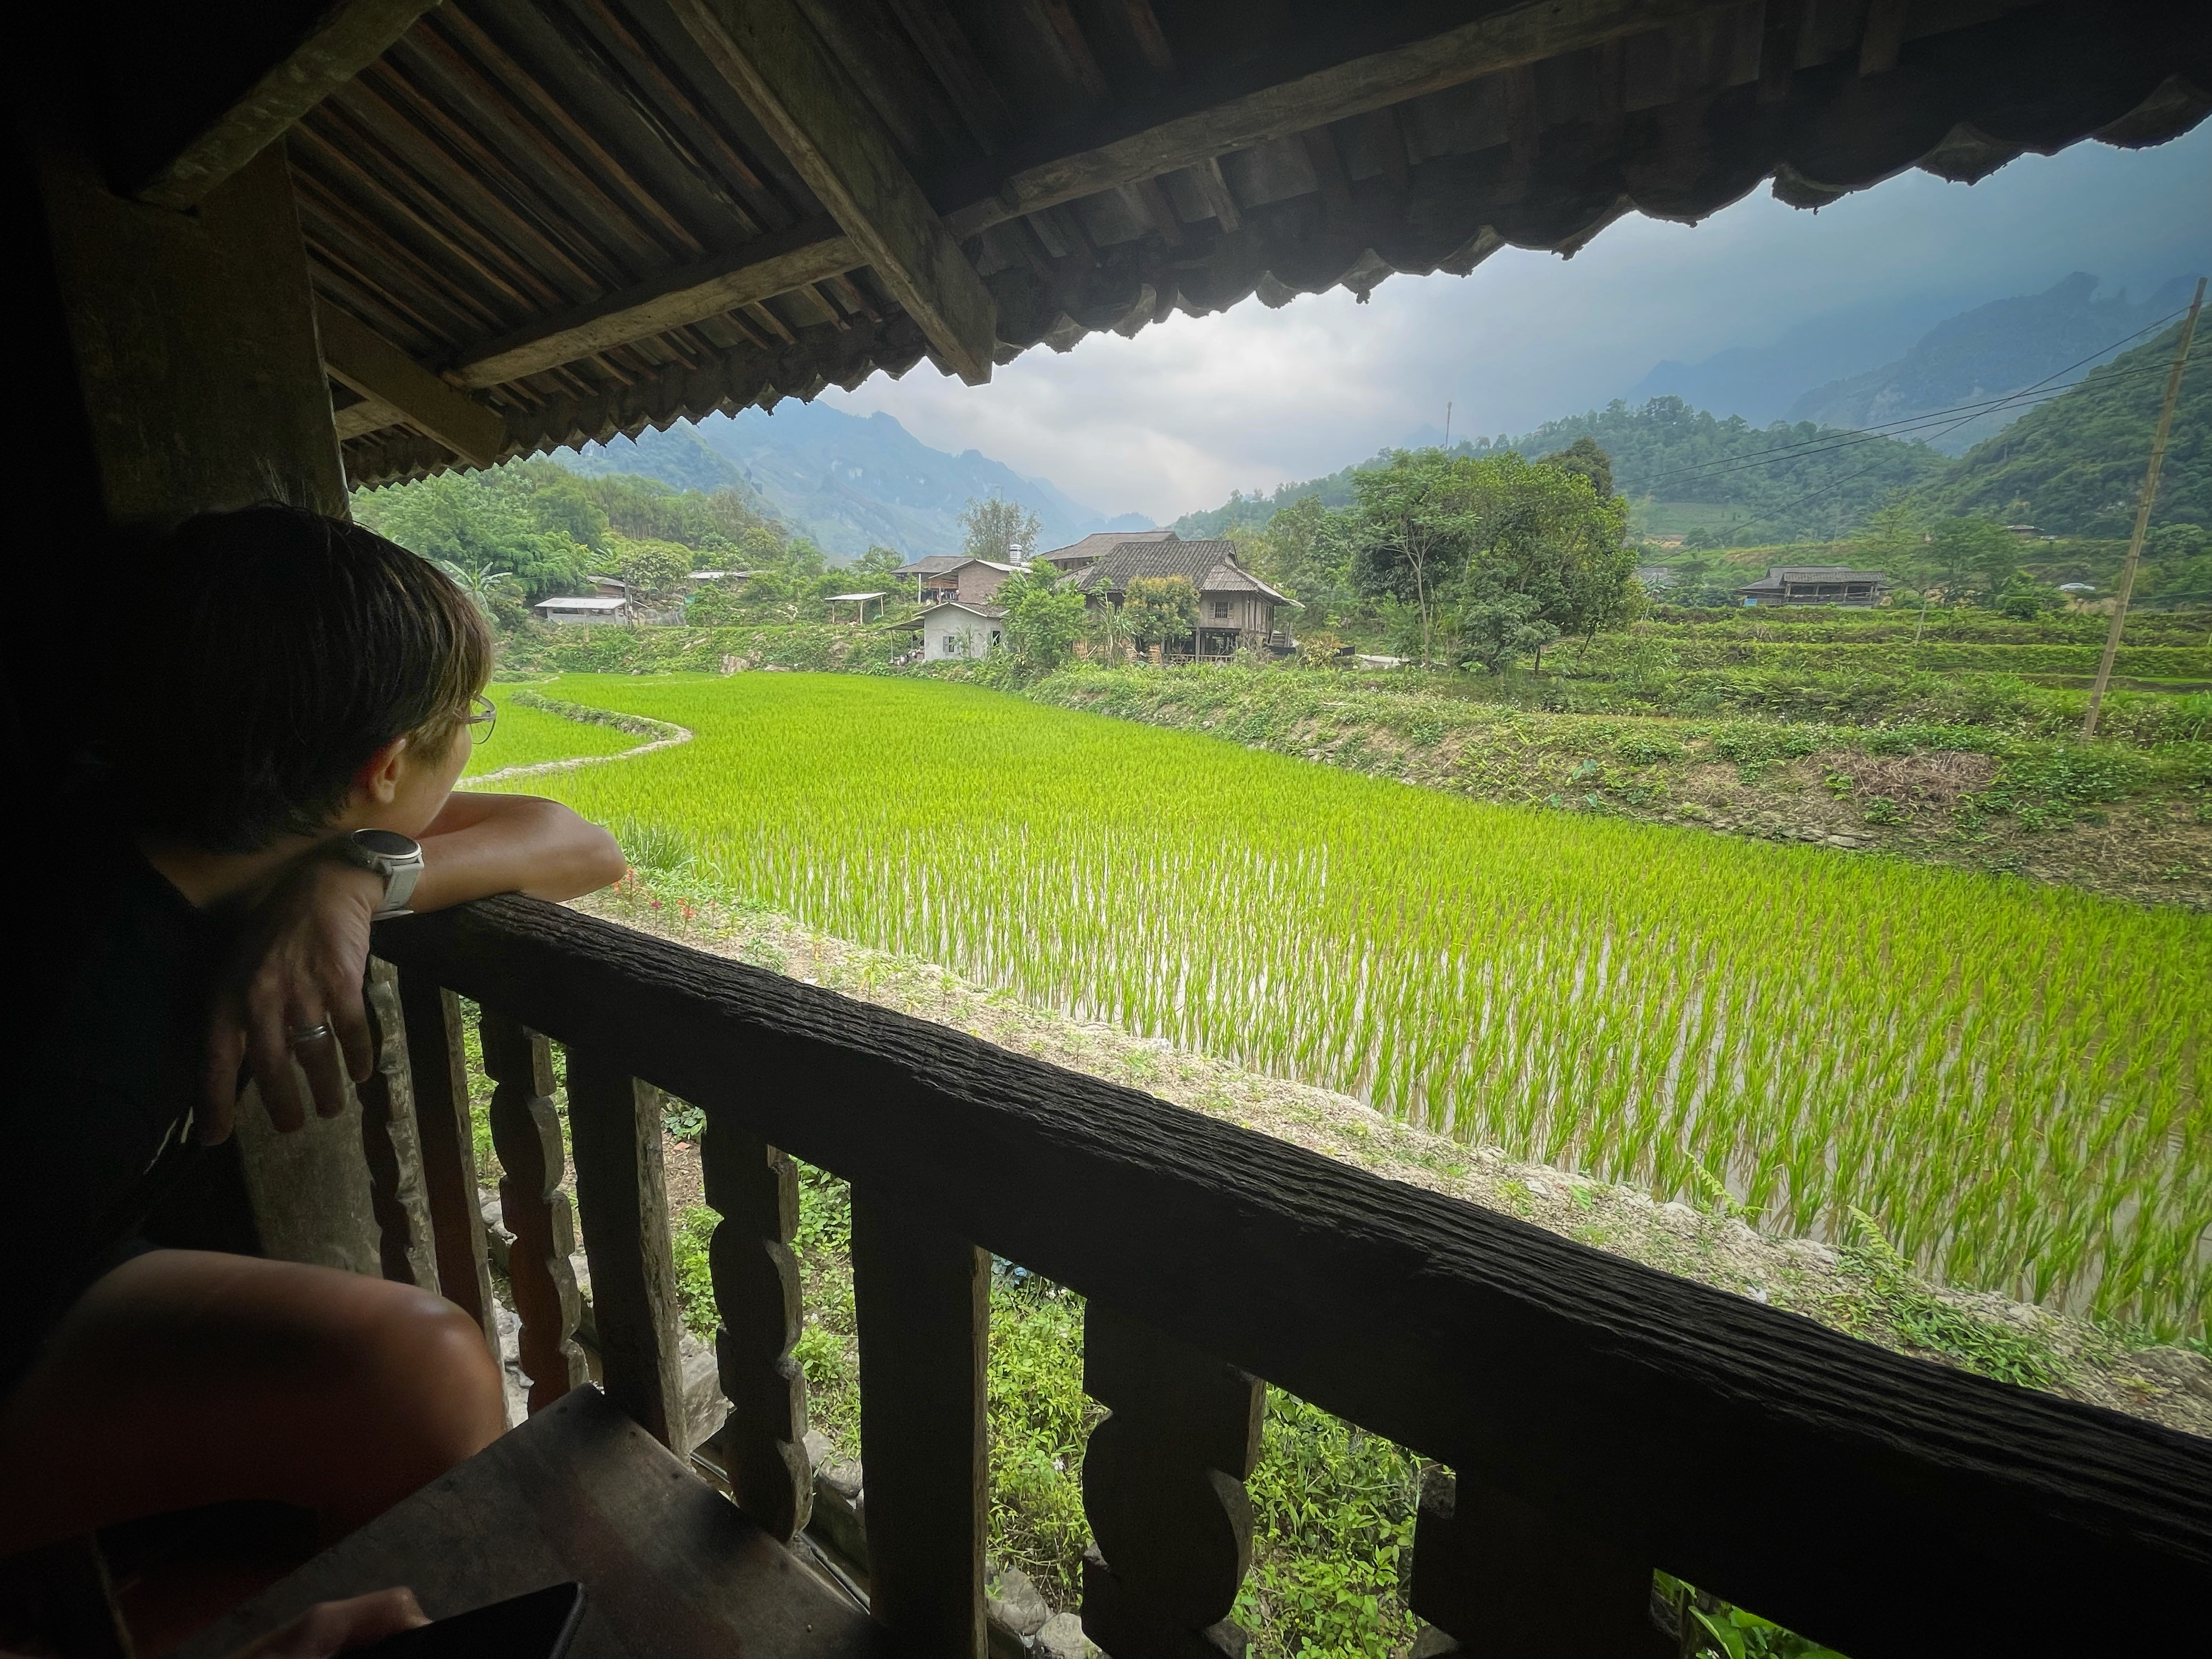
I wanted to call this blog post the cycle tour of waterways and old buildings with some mountains in between, because that’s what it was, but that title wouldn’t have gotten me too many hits.

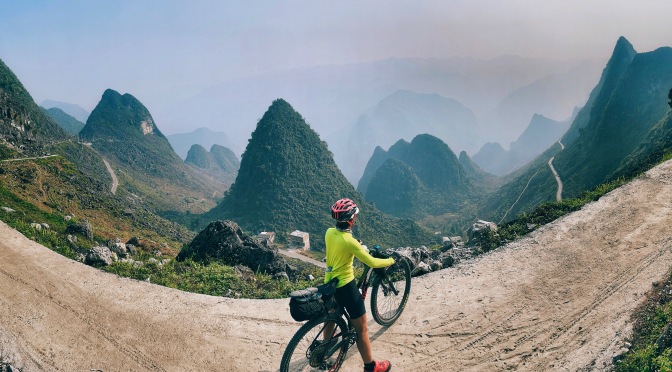
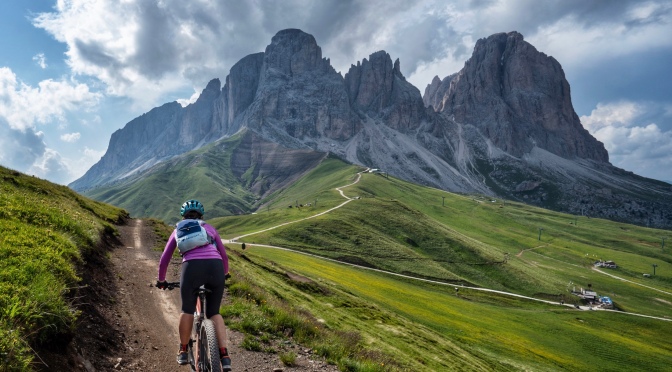
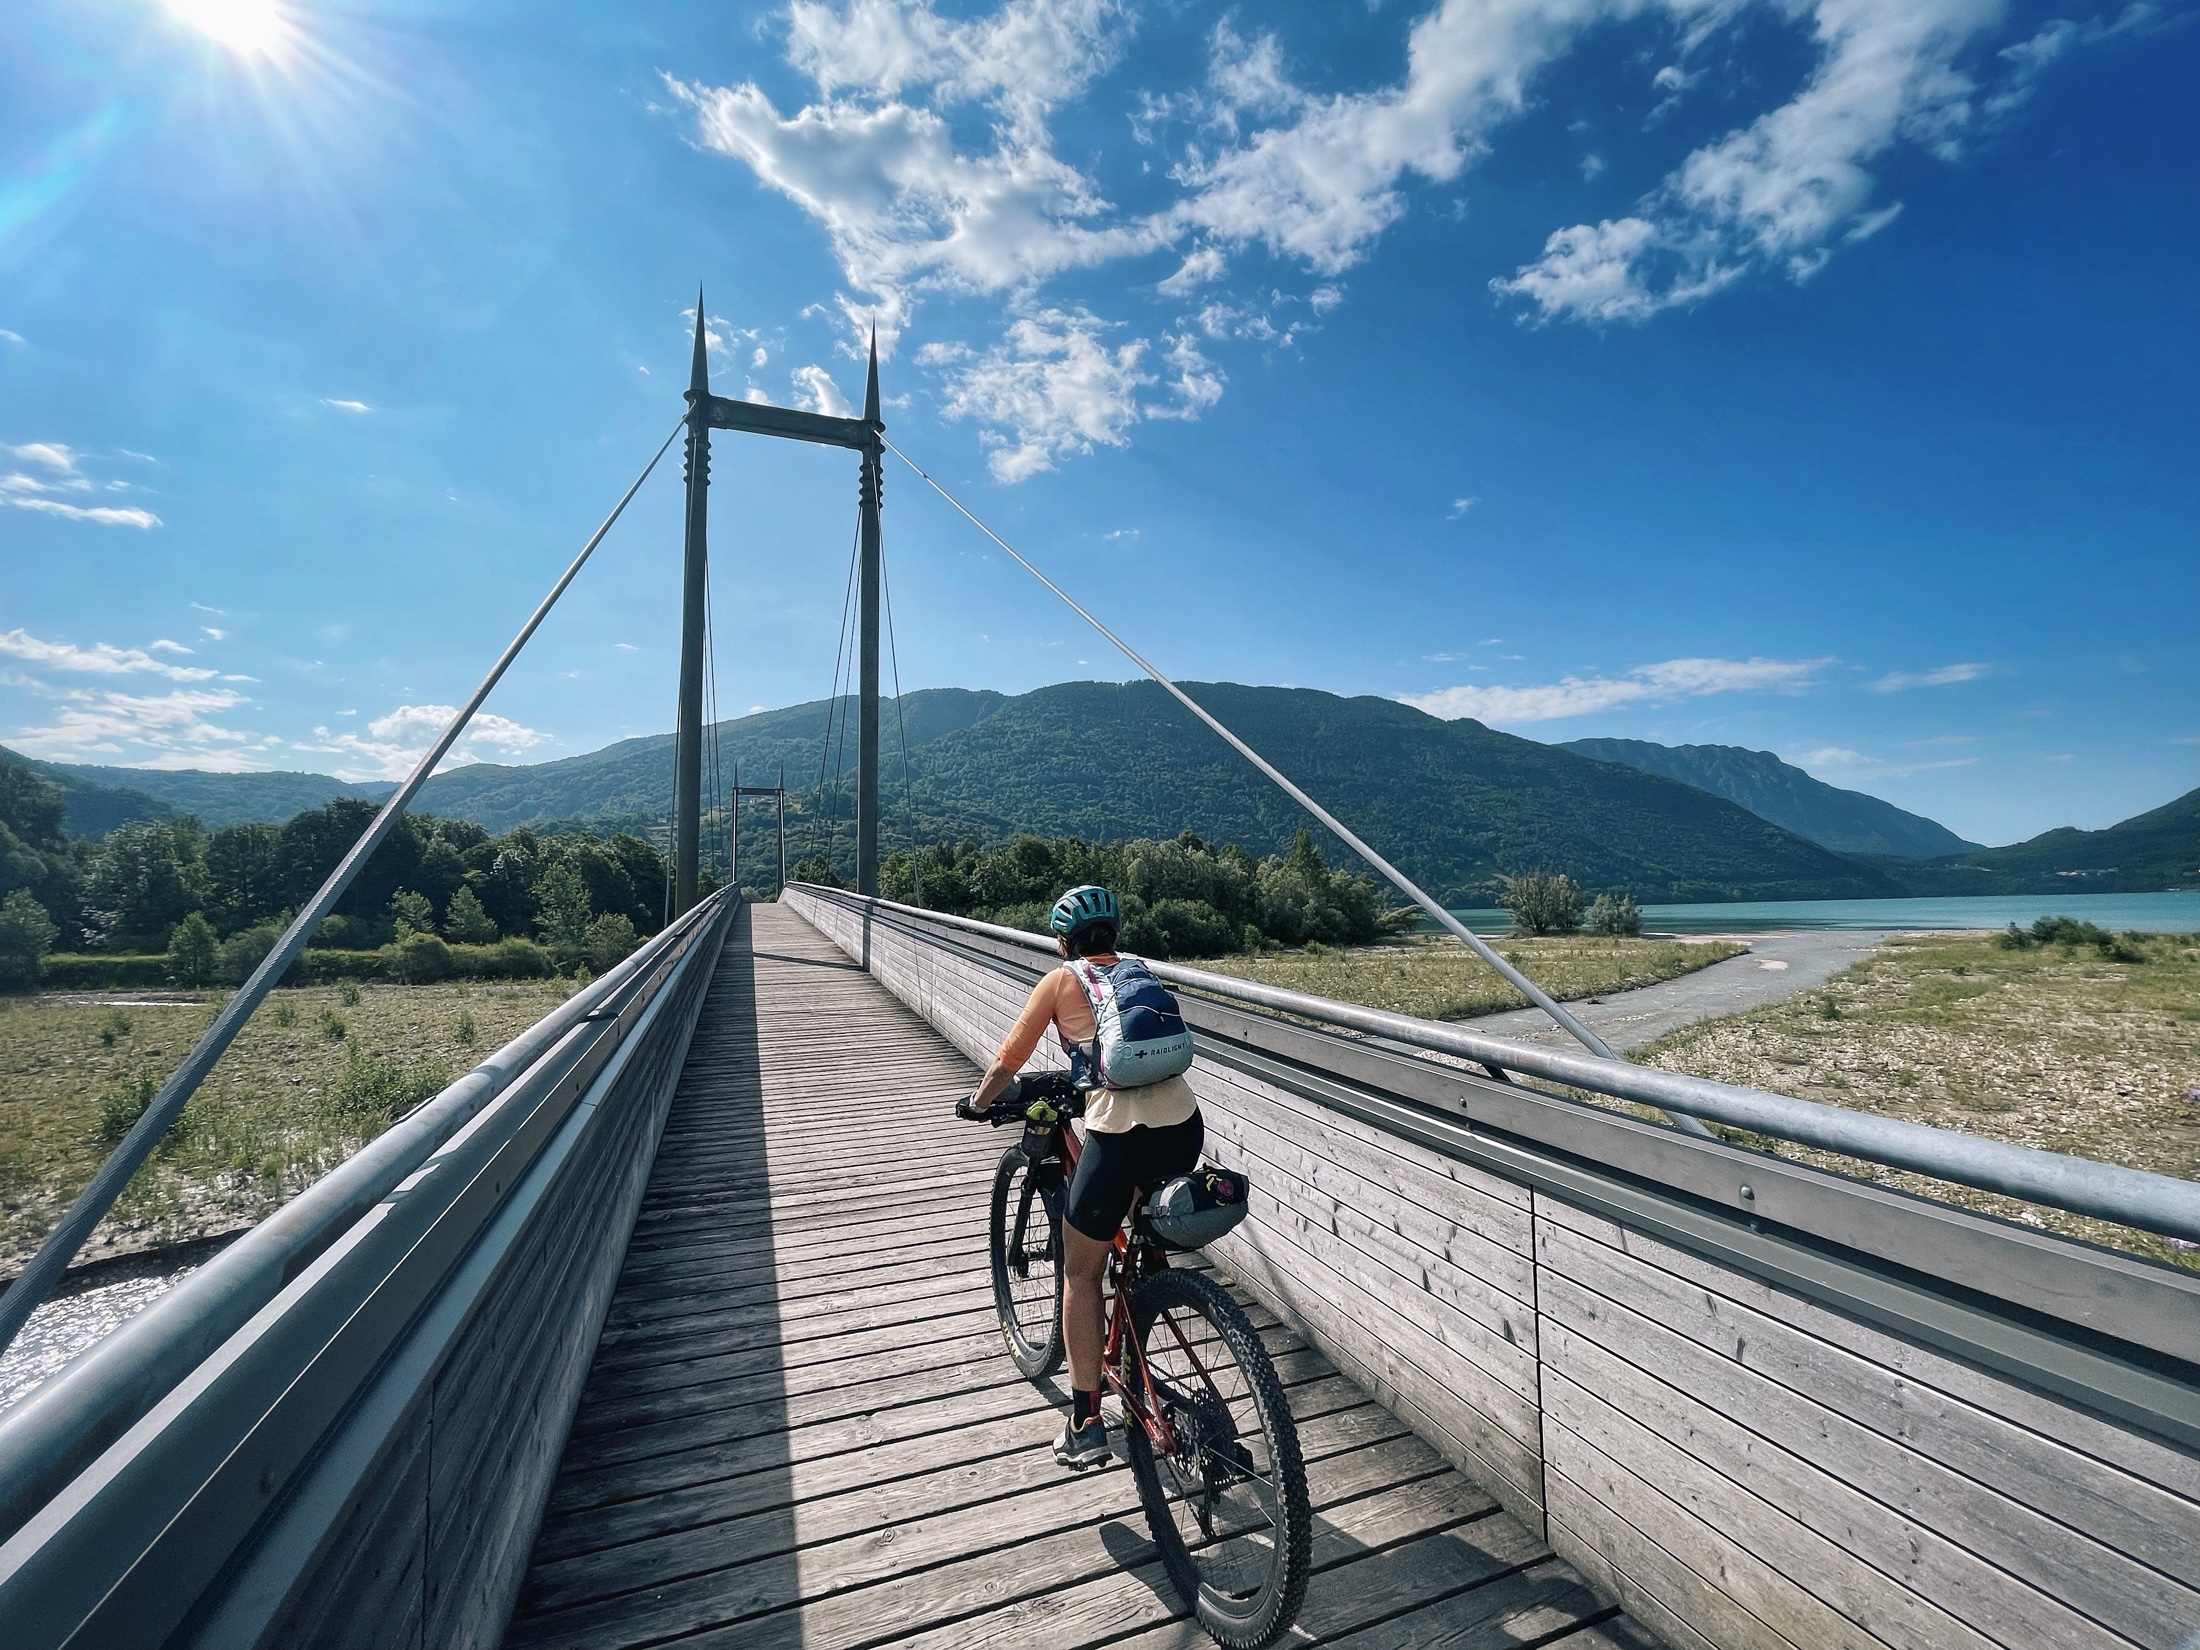
The 560km Munich to Venice cycle route is a mixed surface route that uses mainly cycleways and backroads to connect Germany’s largest southern city with the UNESCO World Heritage city of Venice in Italy, crossing through Austria. It goes over the mountains of the Dolomites, also a UNESCO World Heritage site, and passes through many interesting towns like Bad Tolz, Innsbruck, Brixen, Cortina d’Ampezzo and Treviso.

Marien Platz, Munich

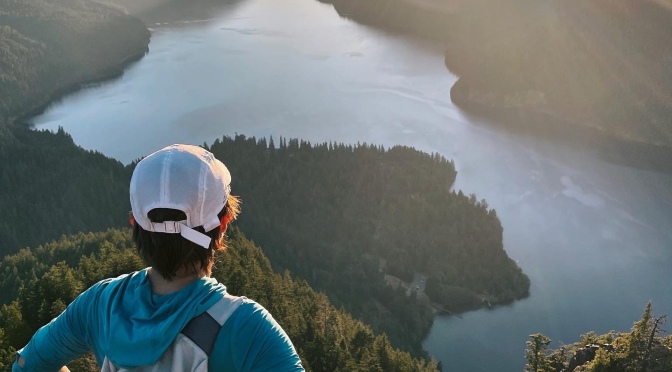
We combined our trip to Venice with a detour to Val Gardena for a week of mountain biking in the Dolomites! So we took our full-suspension Specialized Epic Evos, strapped on some bikepacking bags with a minimal set of clothing and gear, and with a couple of our friends, Lori and Ilya, set off on our ride from Munich.

Leaving Munich on Day 1 on the Munich to Venice Cycle Route

There are 2 routes out of Munich on the Official Munich to Venice Cycle Route. I’ve ridden both, and for most people, I can recommend the western route on the cycleways along the Isar River via the towns of Bad Tolz and Lenggries. The Eastern route via Tegensee has some nice riding with long sections on dirt roads, but also a lot of sections on road.

Dinner at an Austrian restaurant in Achenkirch after our first day riding in the rain

On this trip, to avoid riding in the rain, we took a train from Munich to Lenggries and began our ride from there. We didn’t manage to escape the rain though, but at least it was only for the last hour or so.

I loved the colors riding through the town of Sterzing, Italy on Day 3

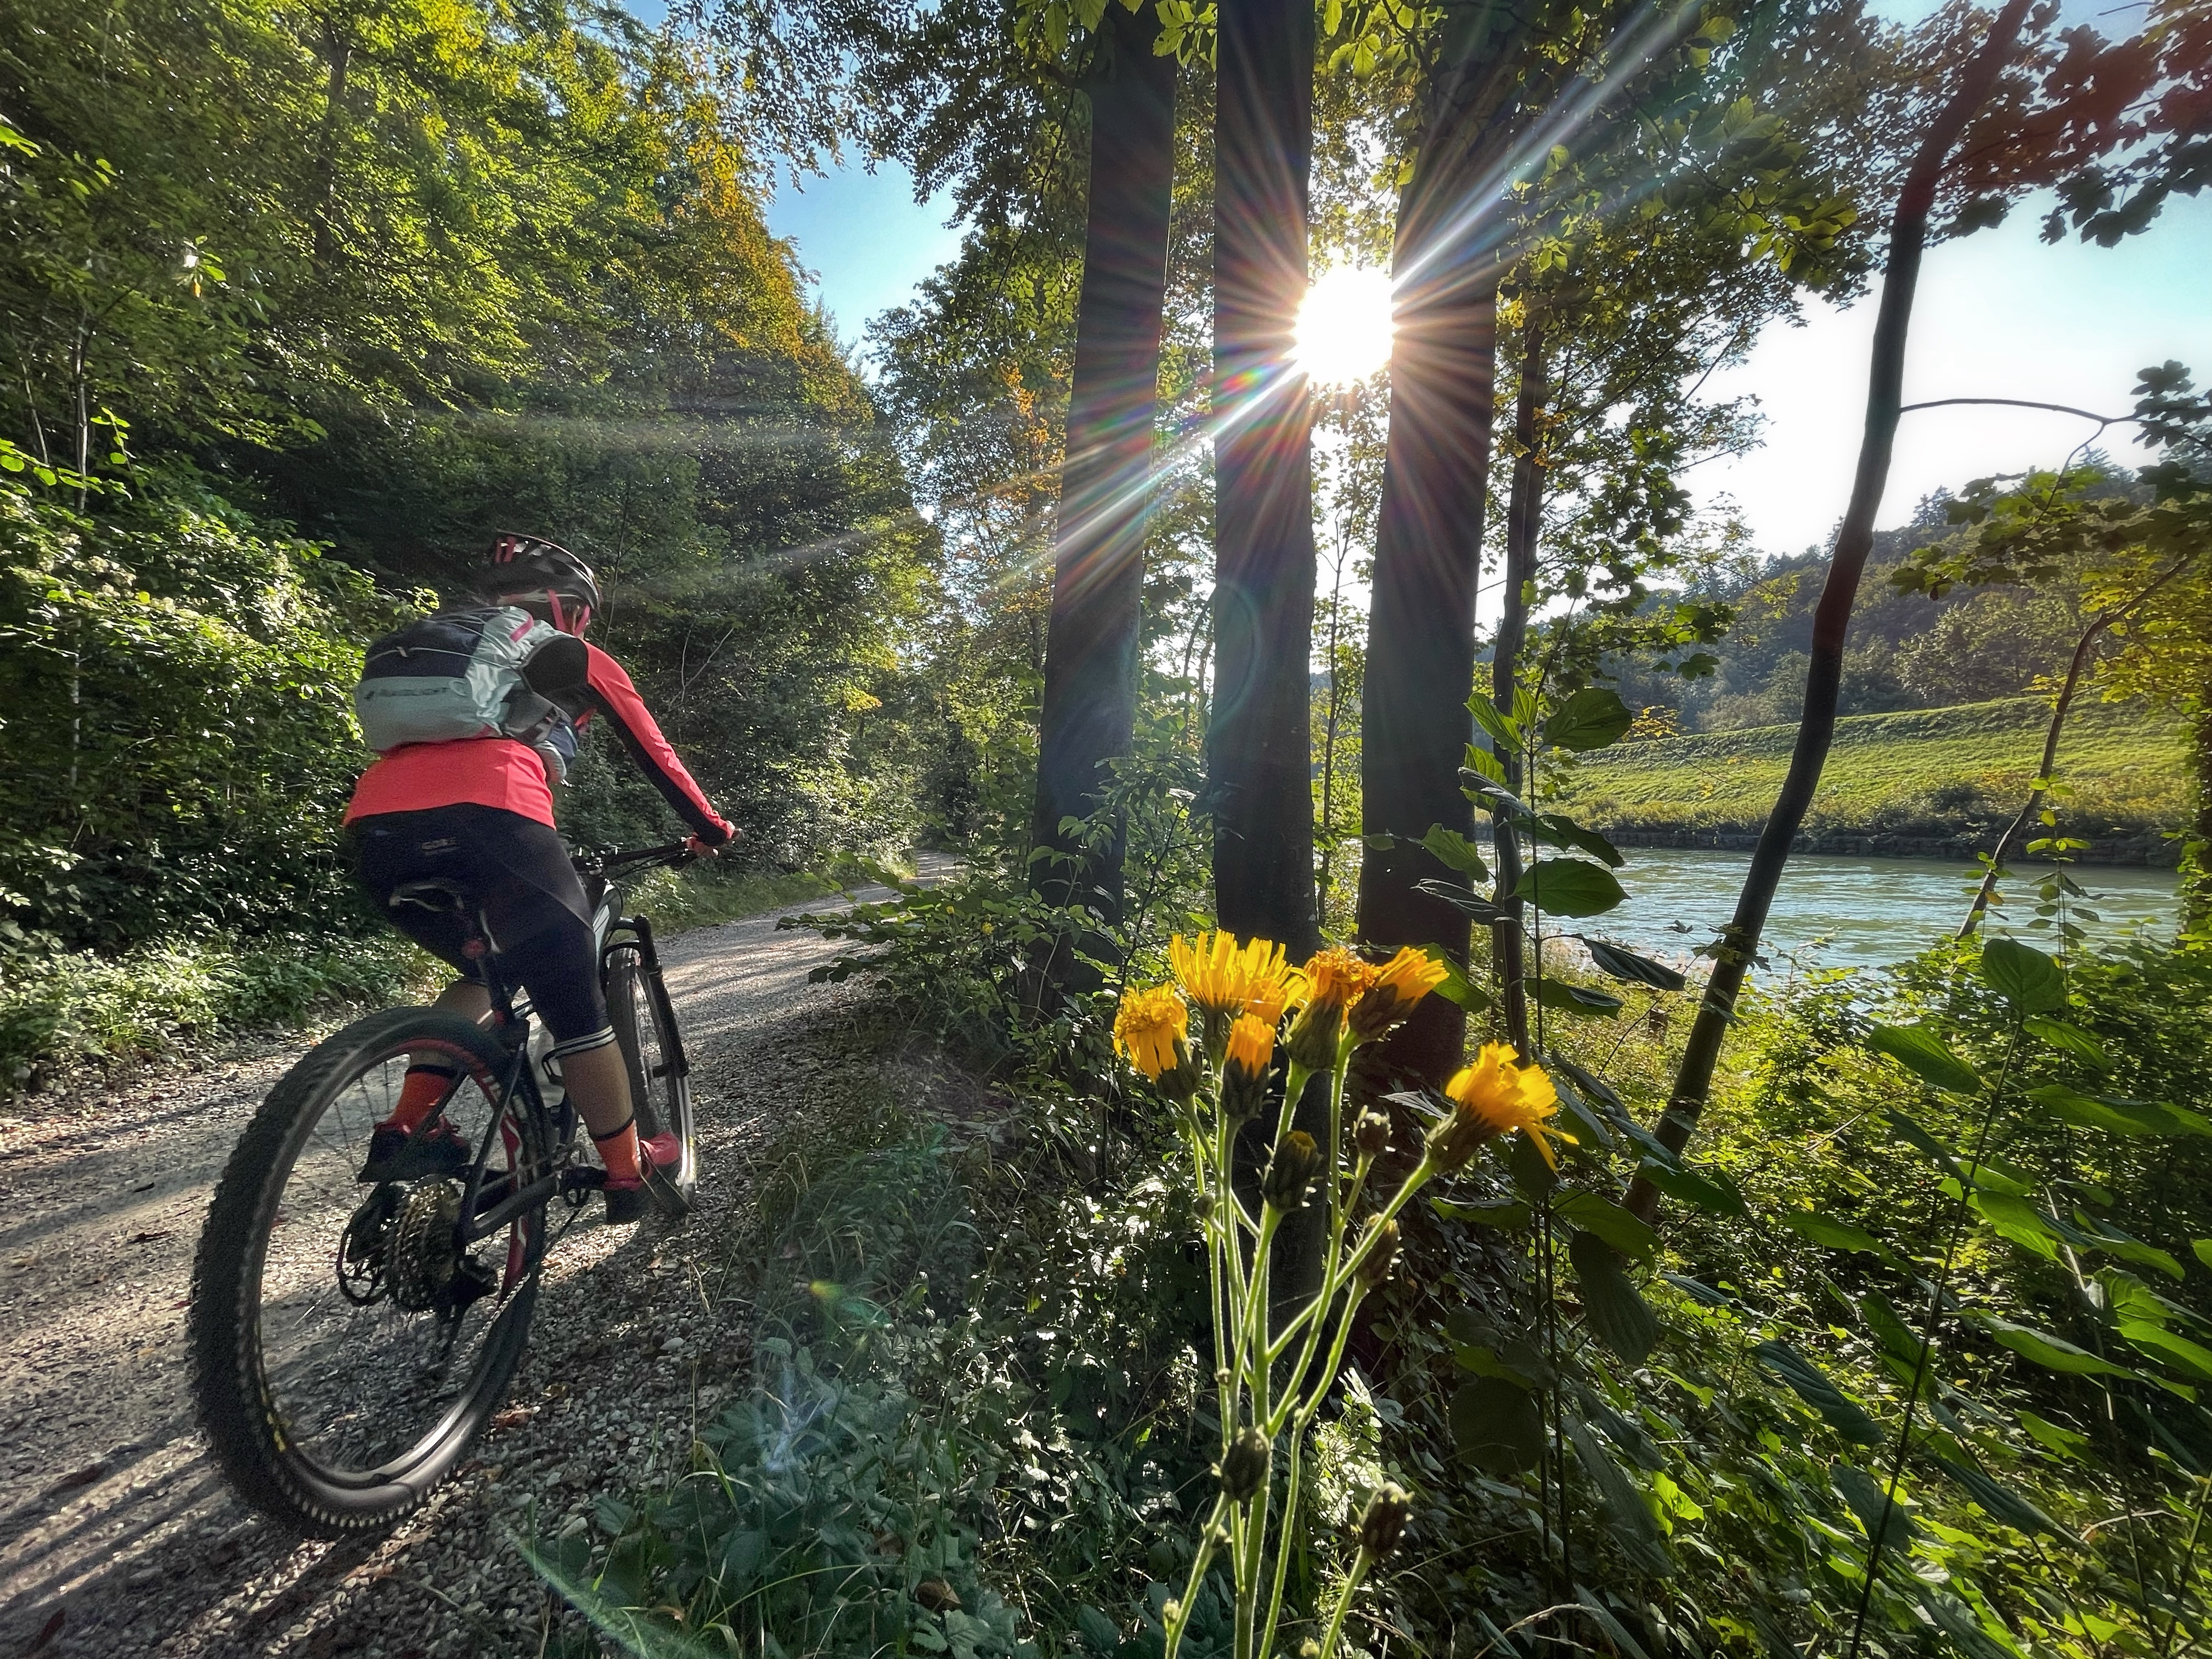
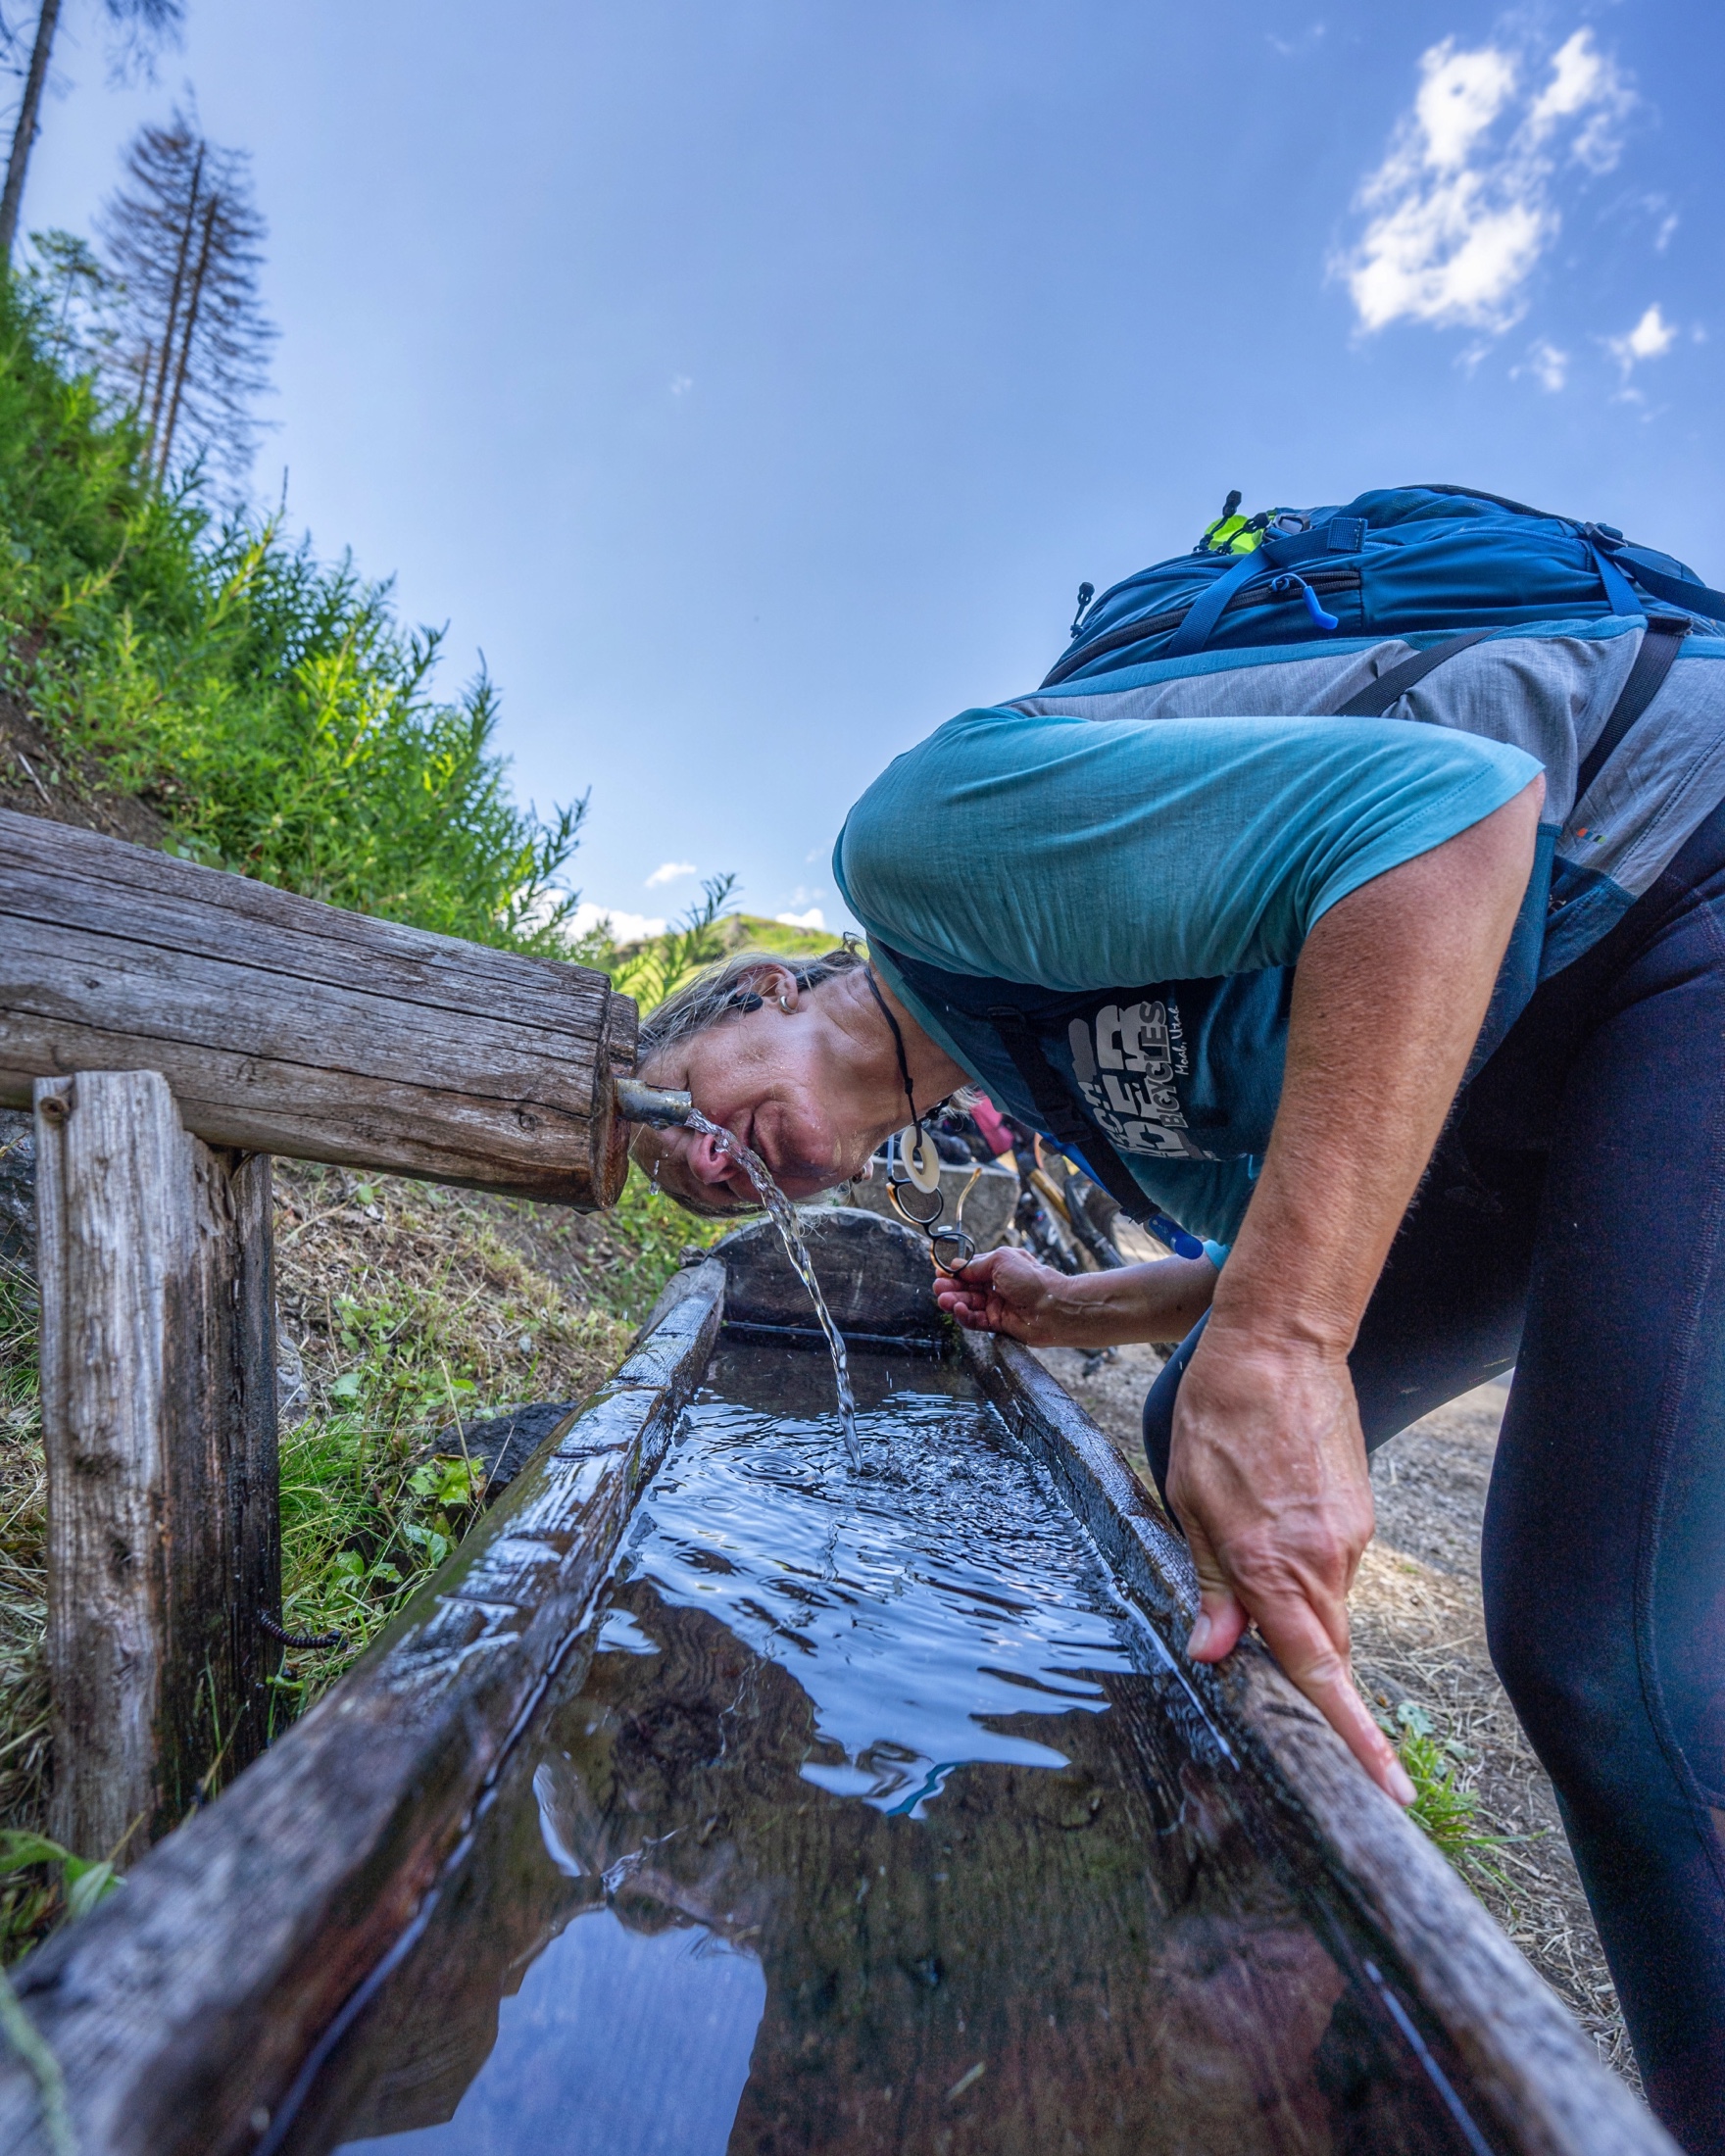
Initially, the riding was almost entirely on paved cycleways, but near towns, it would almost always route us through the center of town. We found it best just to follow the official route, as there were certain jems we would otherwise have missed.

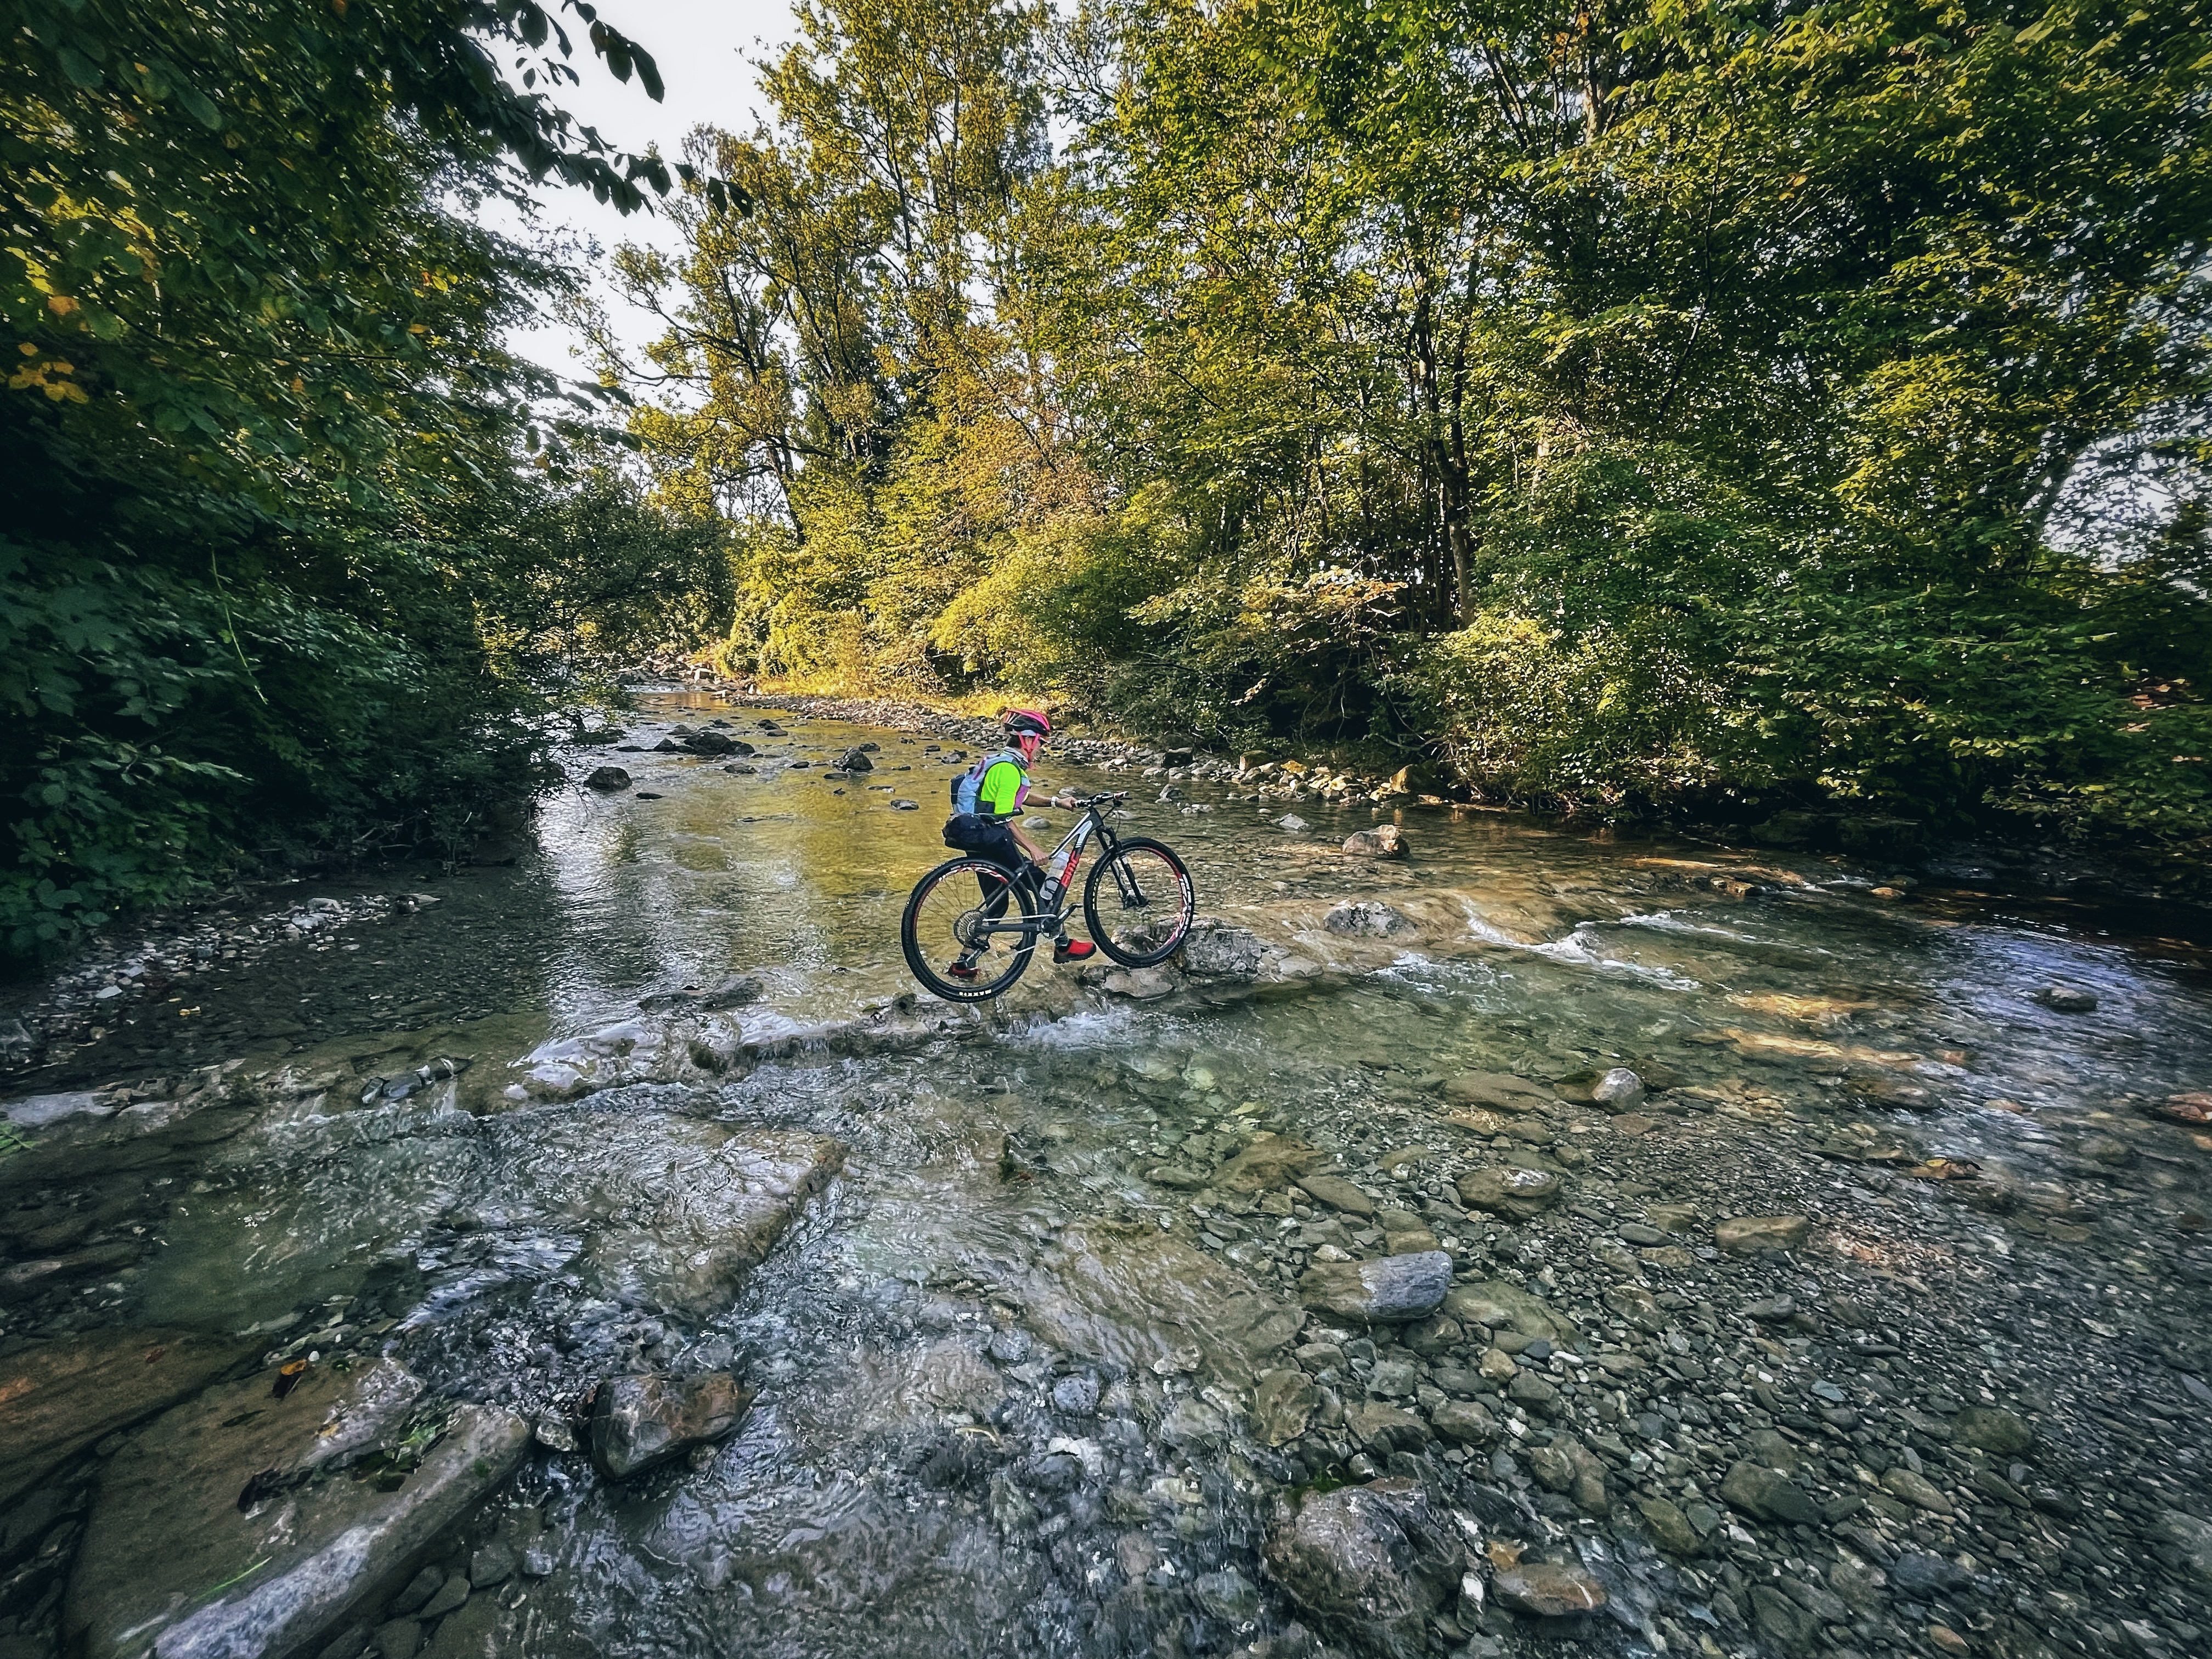
Generally, the riding surface is mixed. Other than paved surfaces, we rode gravel, dirt roads and occasionally, a little singletrack. We were happy on our mountain bikes, but we saw lots of different bikes, a lot of ebikes and other mountain bikes, and also hybrids and gravel bikes.

This part of the cycleway is a converted disused rail line

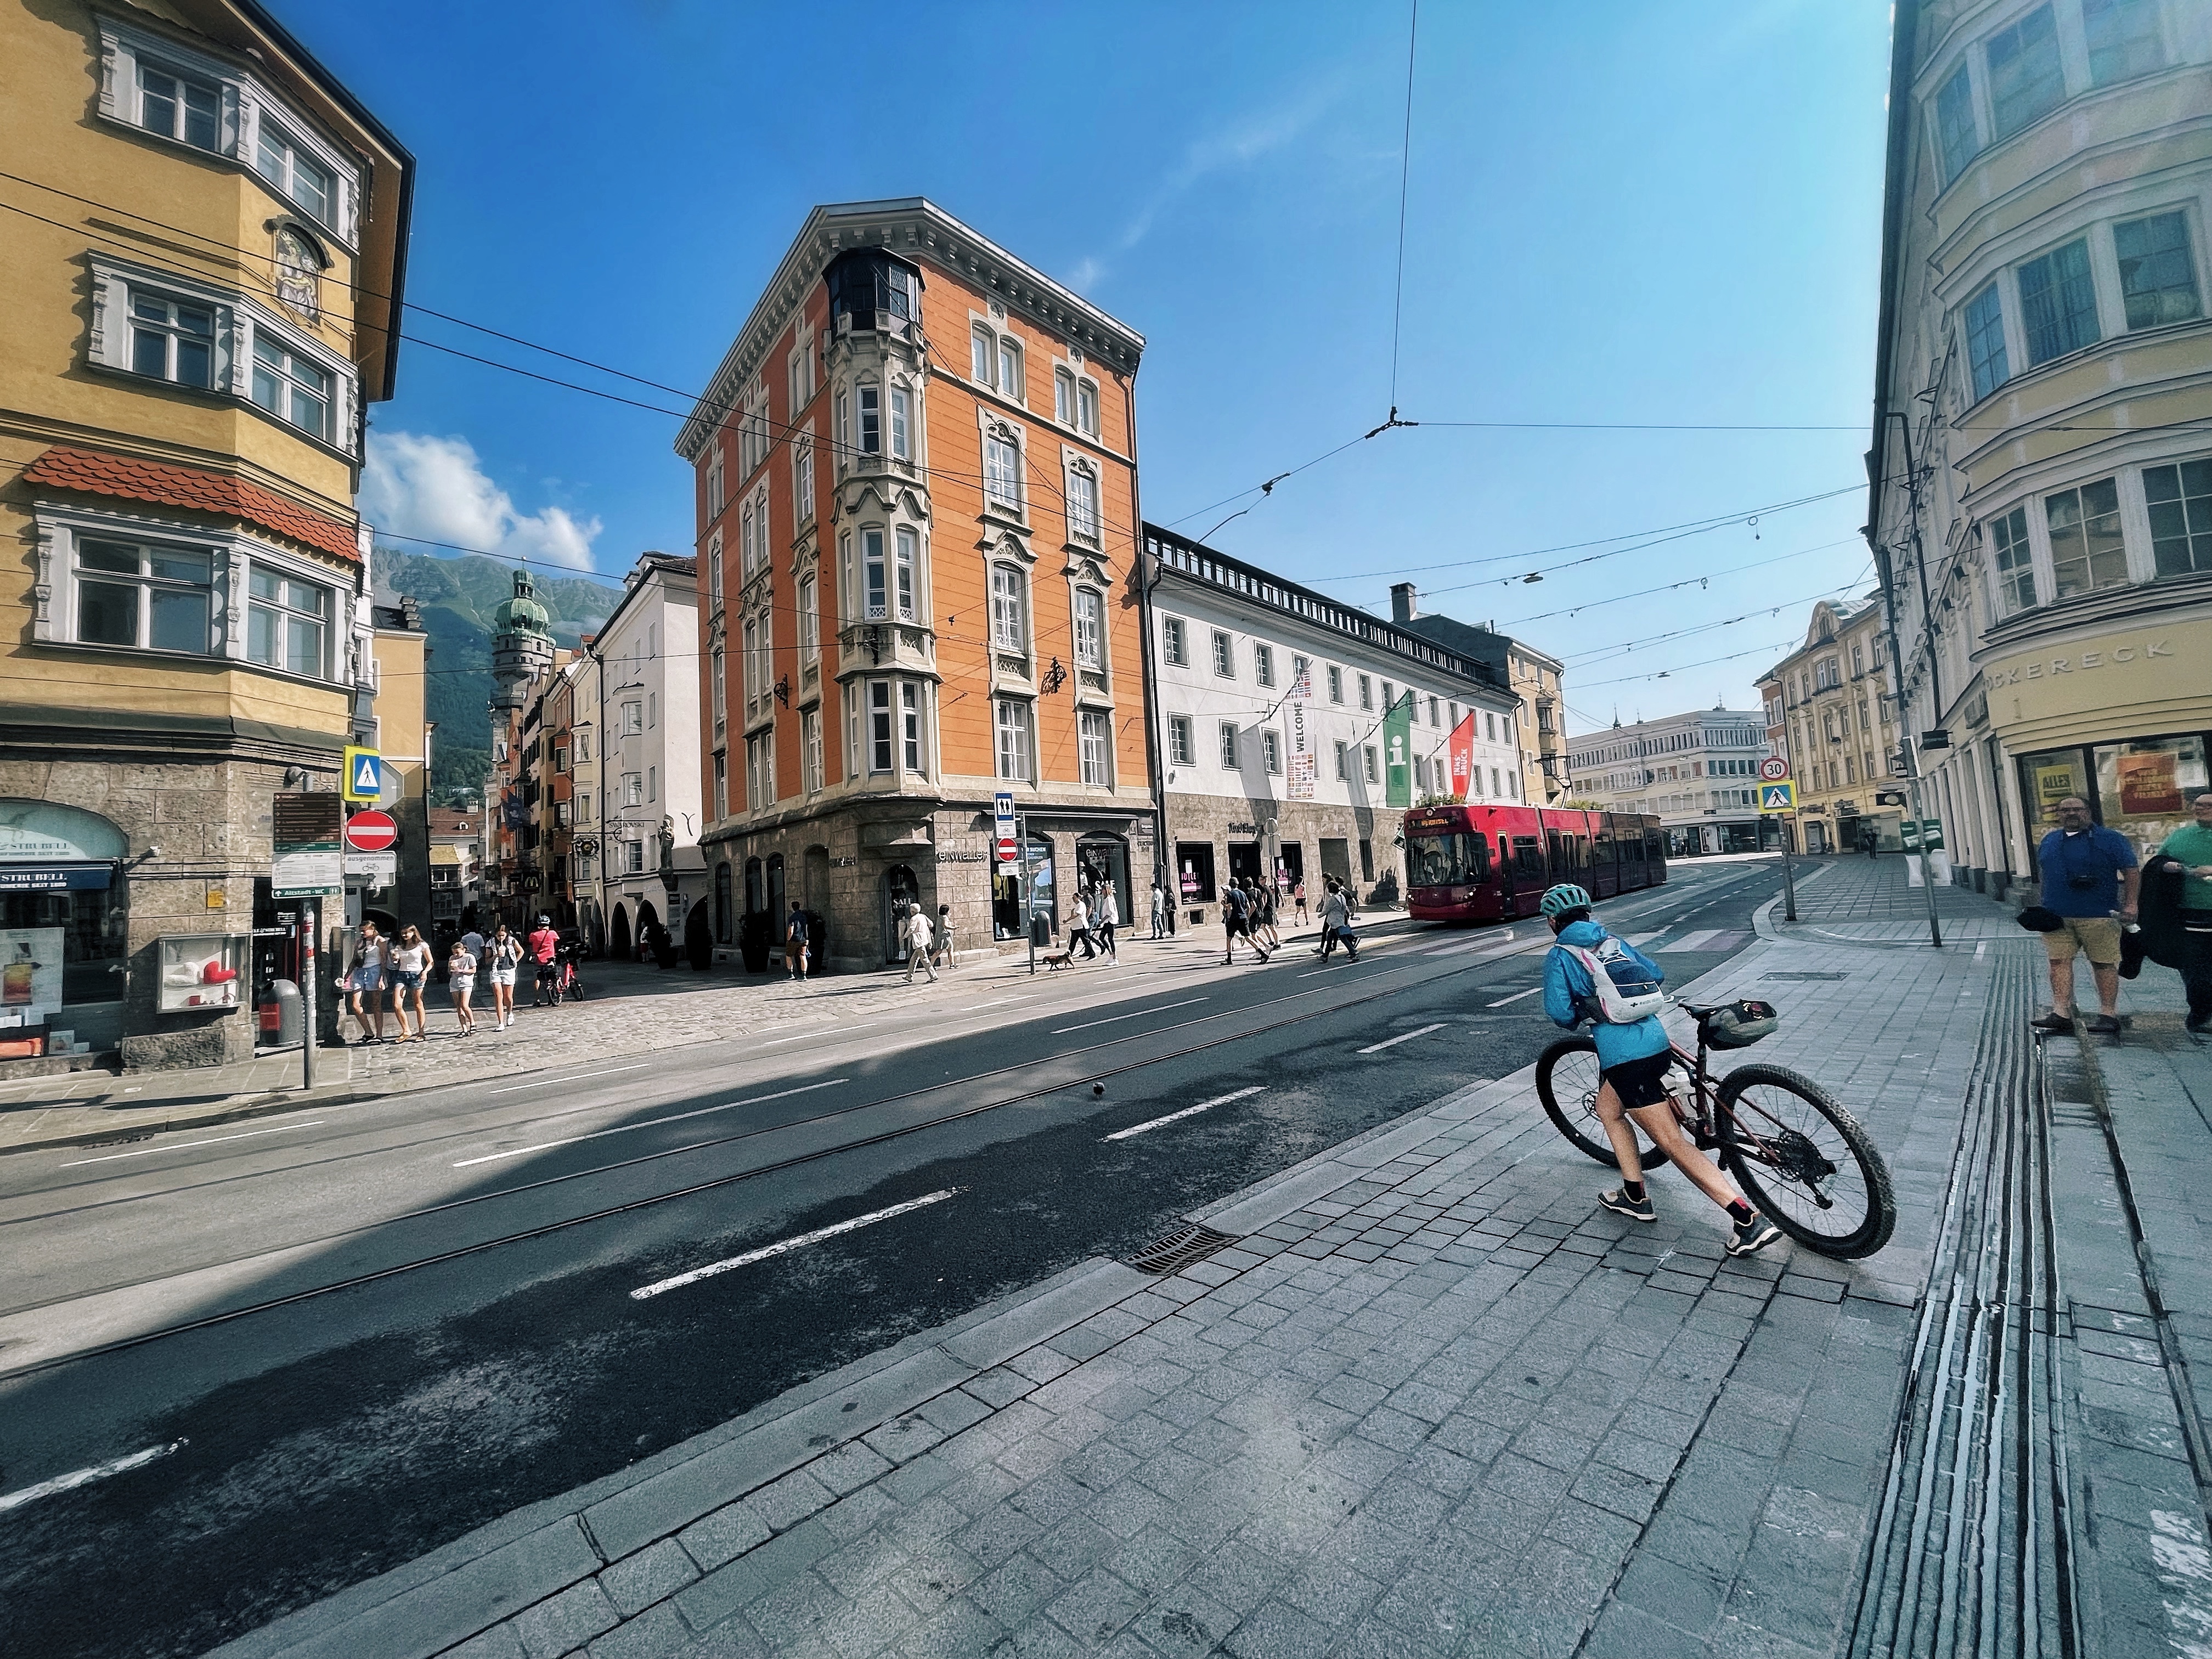
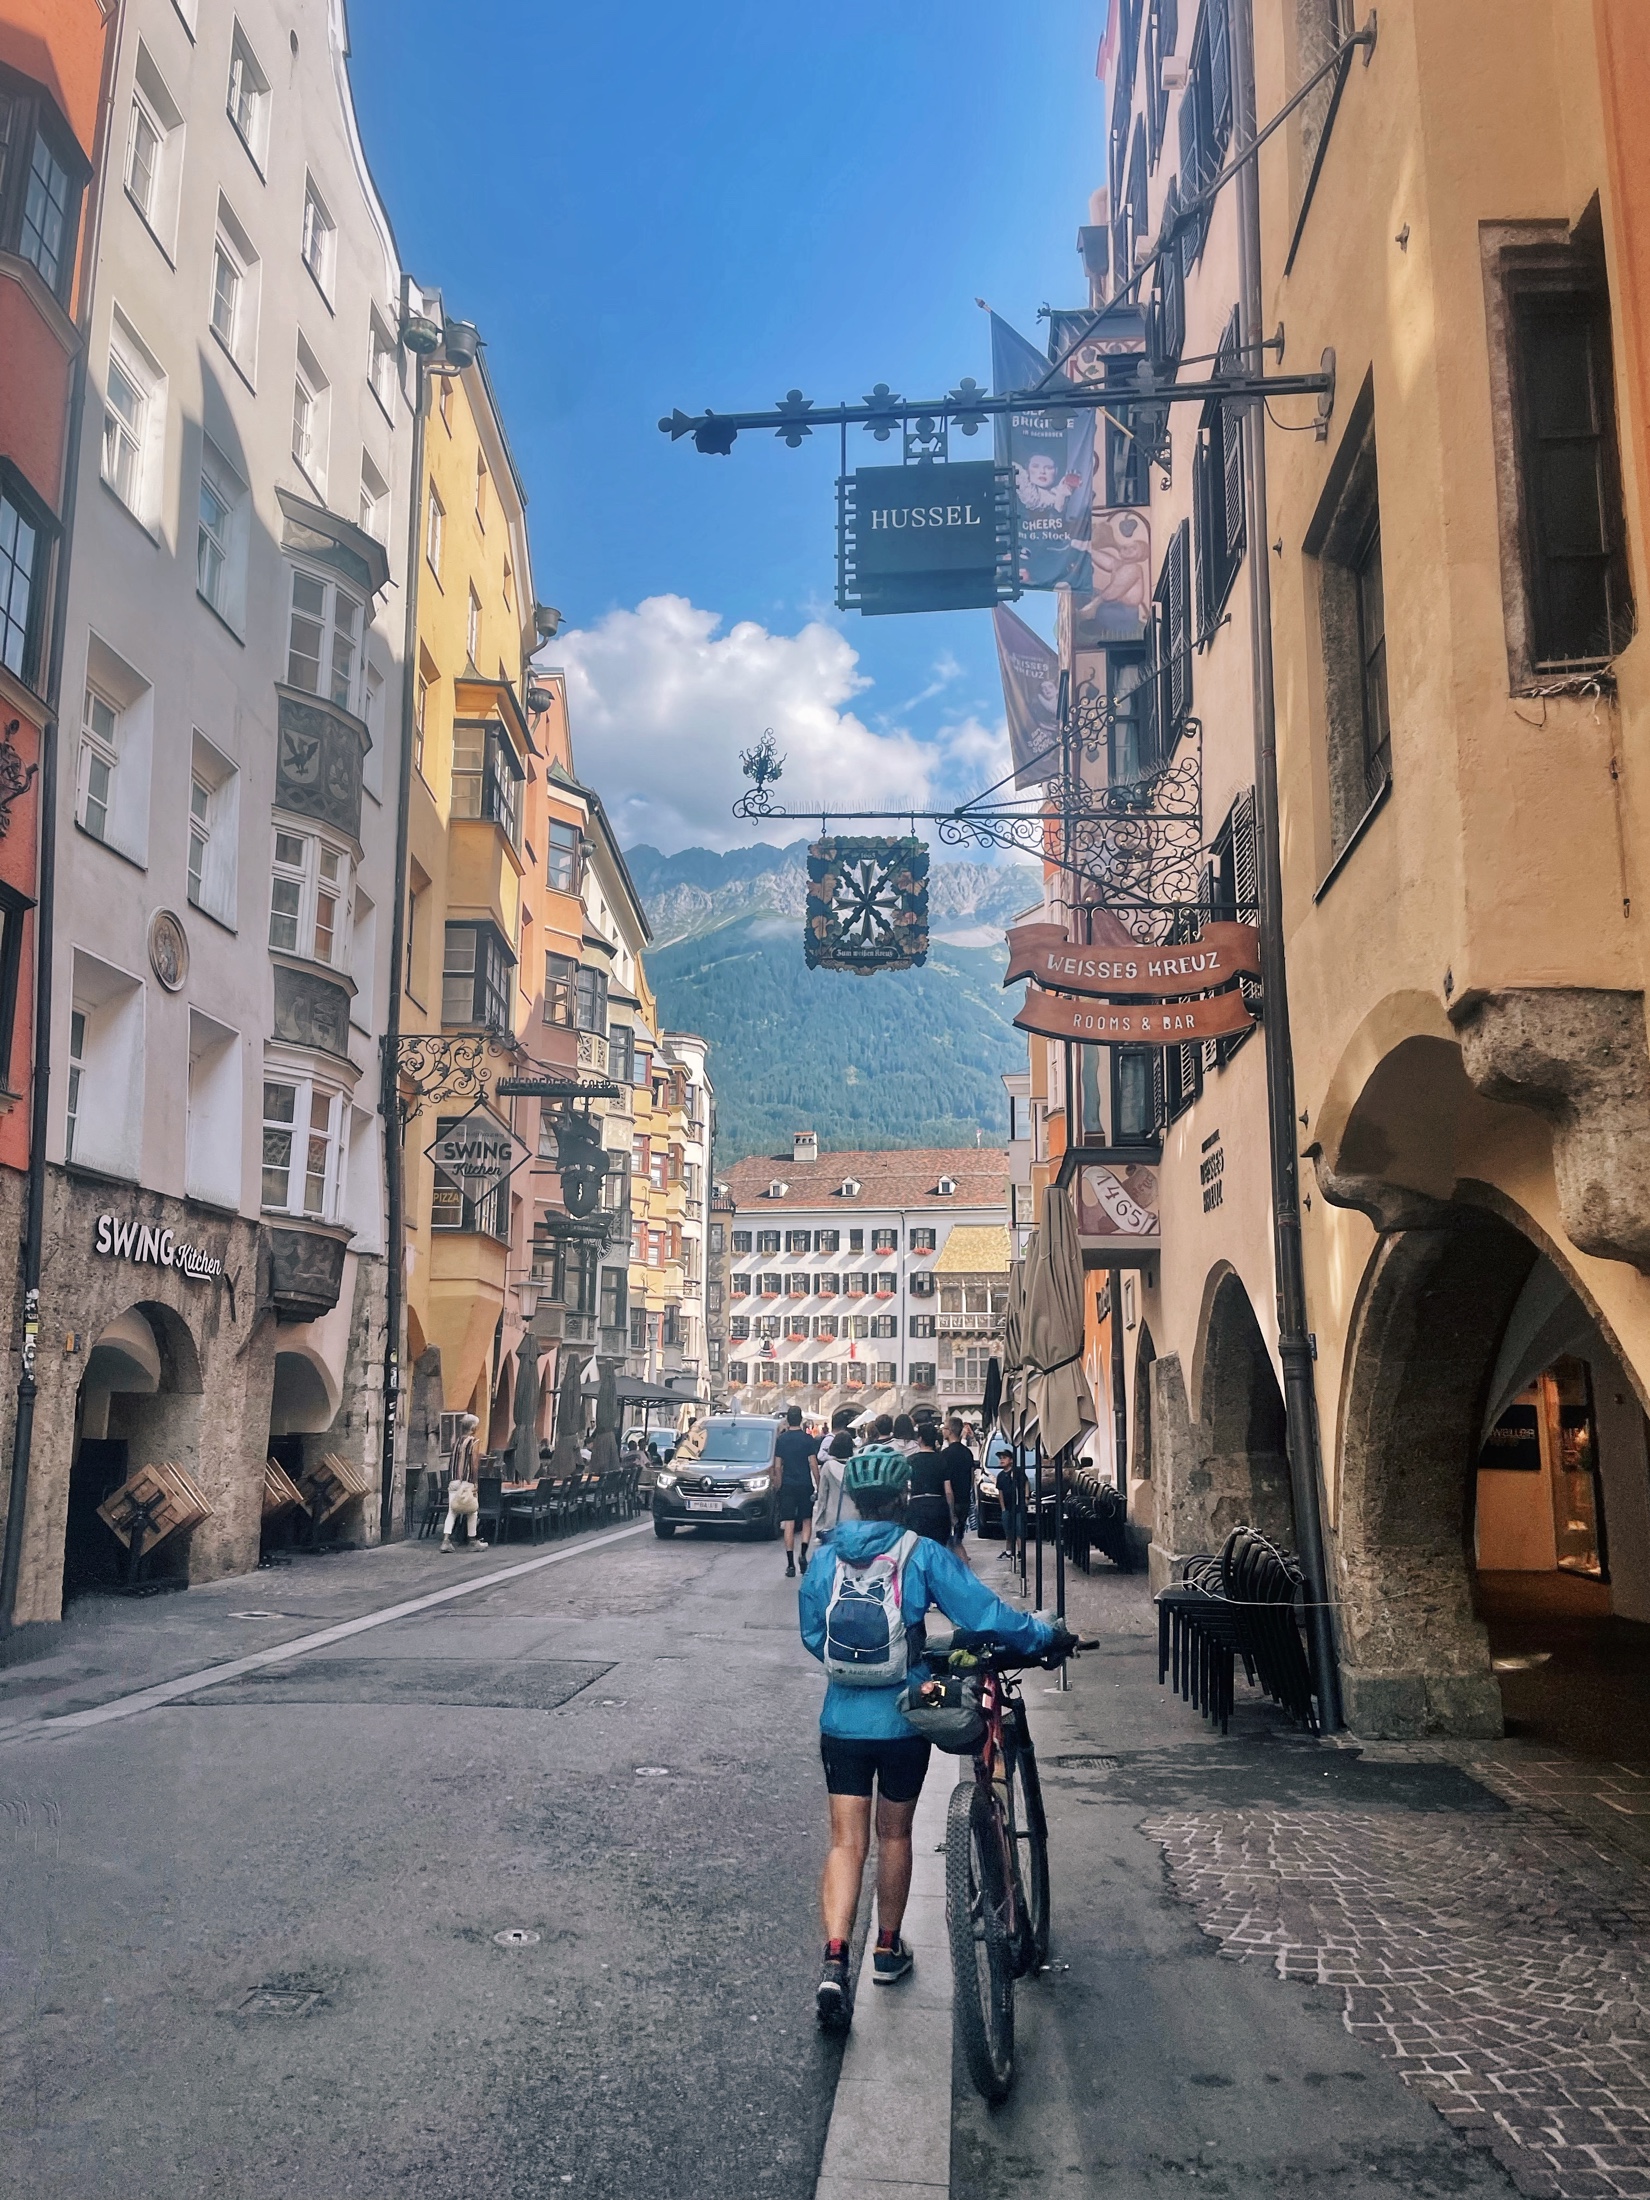
Innsbruck, Austria was an exception to the route going through town. When we passed through Innsbruck, the route took a steep climb on a pretty busy road with no shoulder. Not comfortable with this, we decided to take a train one stop to Matre, where we continued our ride.

A ride into the old part of Innsbruck is worth the detour, and if pressed for time, I would consider taking the train one stop to Matre.

Laura crossing the street in Innsbruck

Lori and Ilya were using voice navigation on Komoot, a navigation app. They used Shokz bone conduction headphones, which didn’t interfere with their ability to hear traffic, to receive the instructions. I tried it out, using just the speakers on my iphone, but I couldn’t hear the instructions at times to to trafffic or wind noise. Otherwise though, the voice instructions on Komoot were pretty clear, and the best implementation for off road cycling I’ve come across.

Laura walking past Mozart’s home in Innsbruck

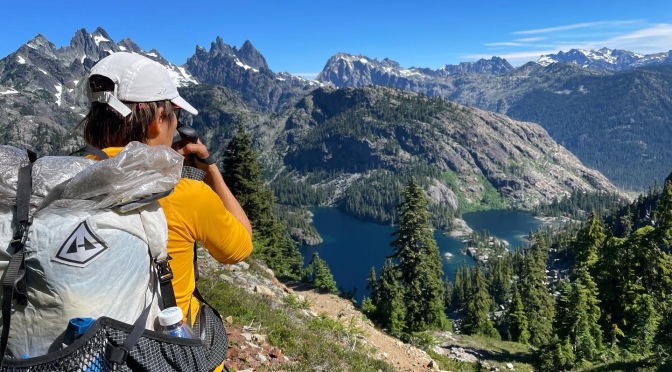
Leaving Innsbruck, we stopped in Brixen and had a rest day there, riding a local trail and enjoyed a food festival. From Brixen, we left the official Munich to Venice route and began climbing to Santa Cristina, a small town in the heart of Val Gardena Dolomites, where we had chosen to spend some time mountain biking.

Selle Ronda Mountain Bike Route Clockwise

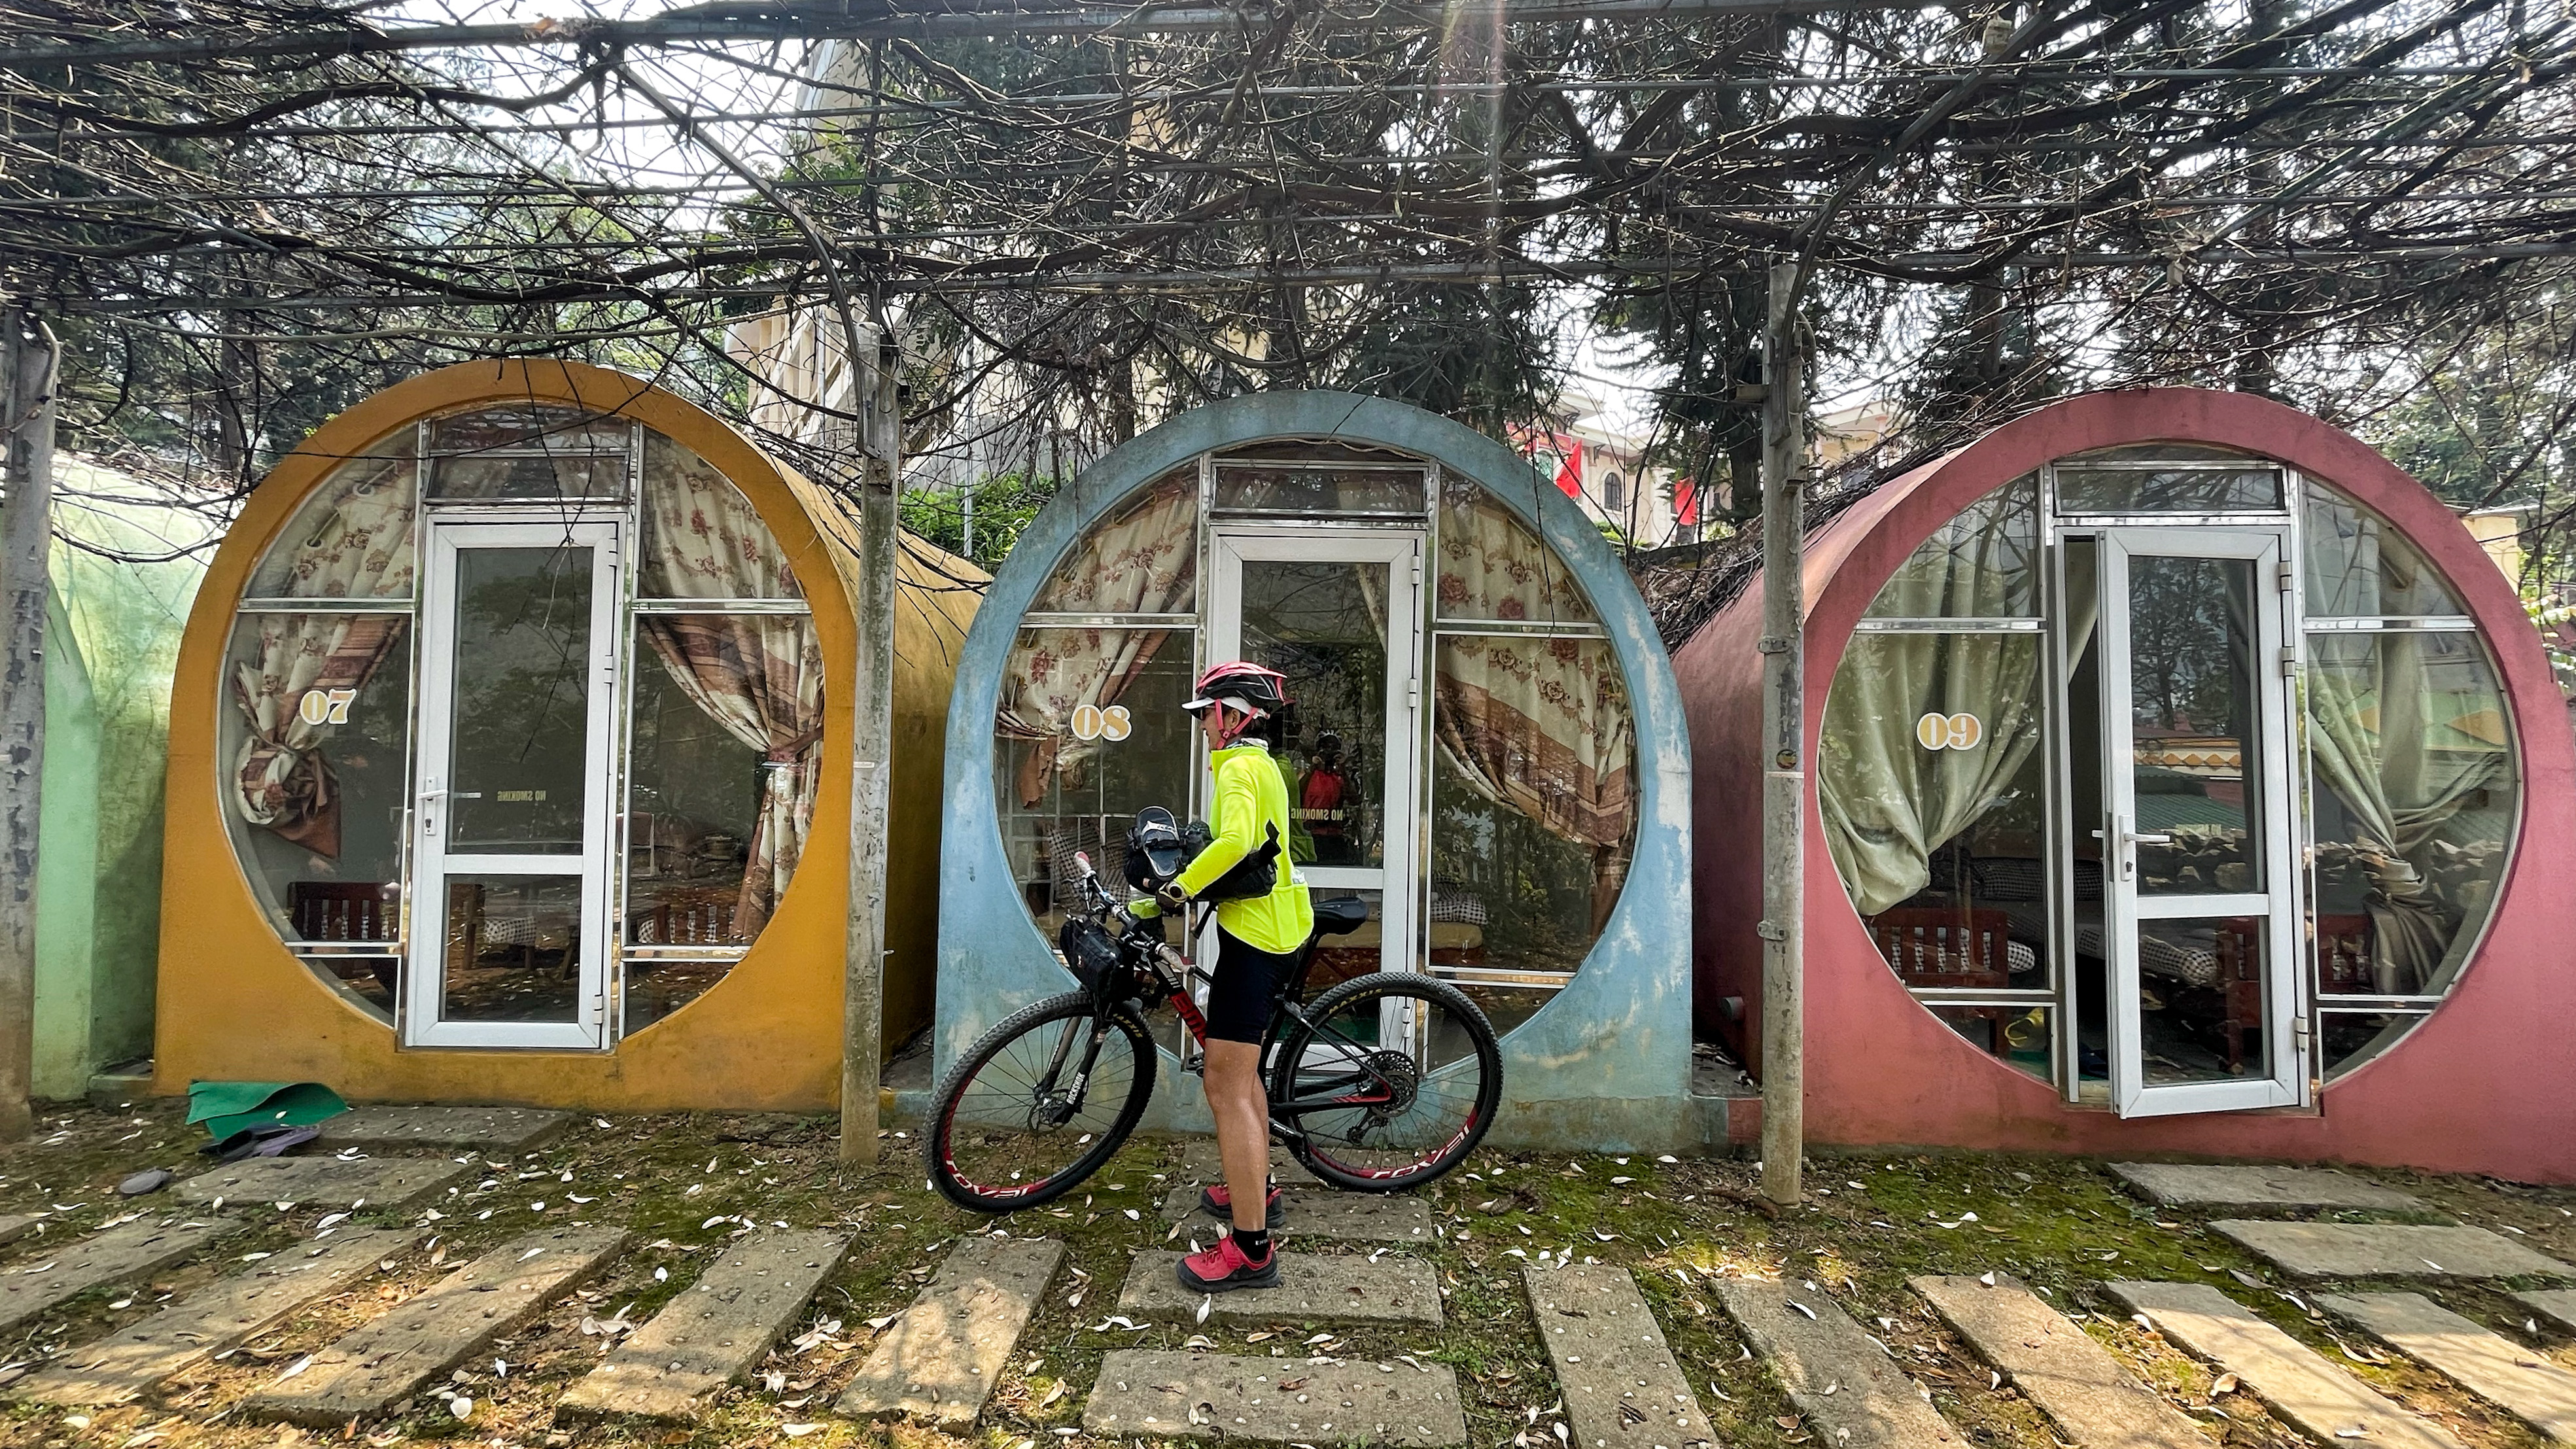
In Santa Cristina, we stayed at Kedul Bike Lodge (recommended) for 9 days, removed the racks and bikepacking bags, hit the trails and did some exploring.

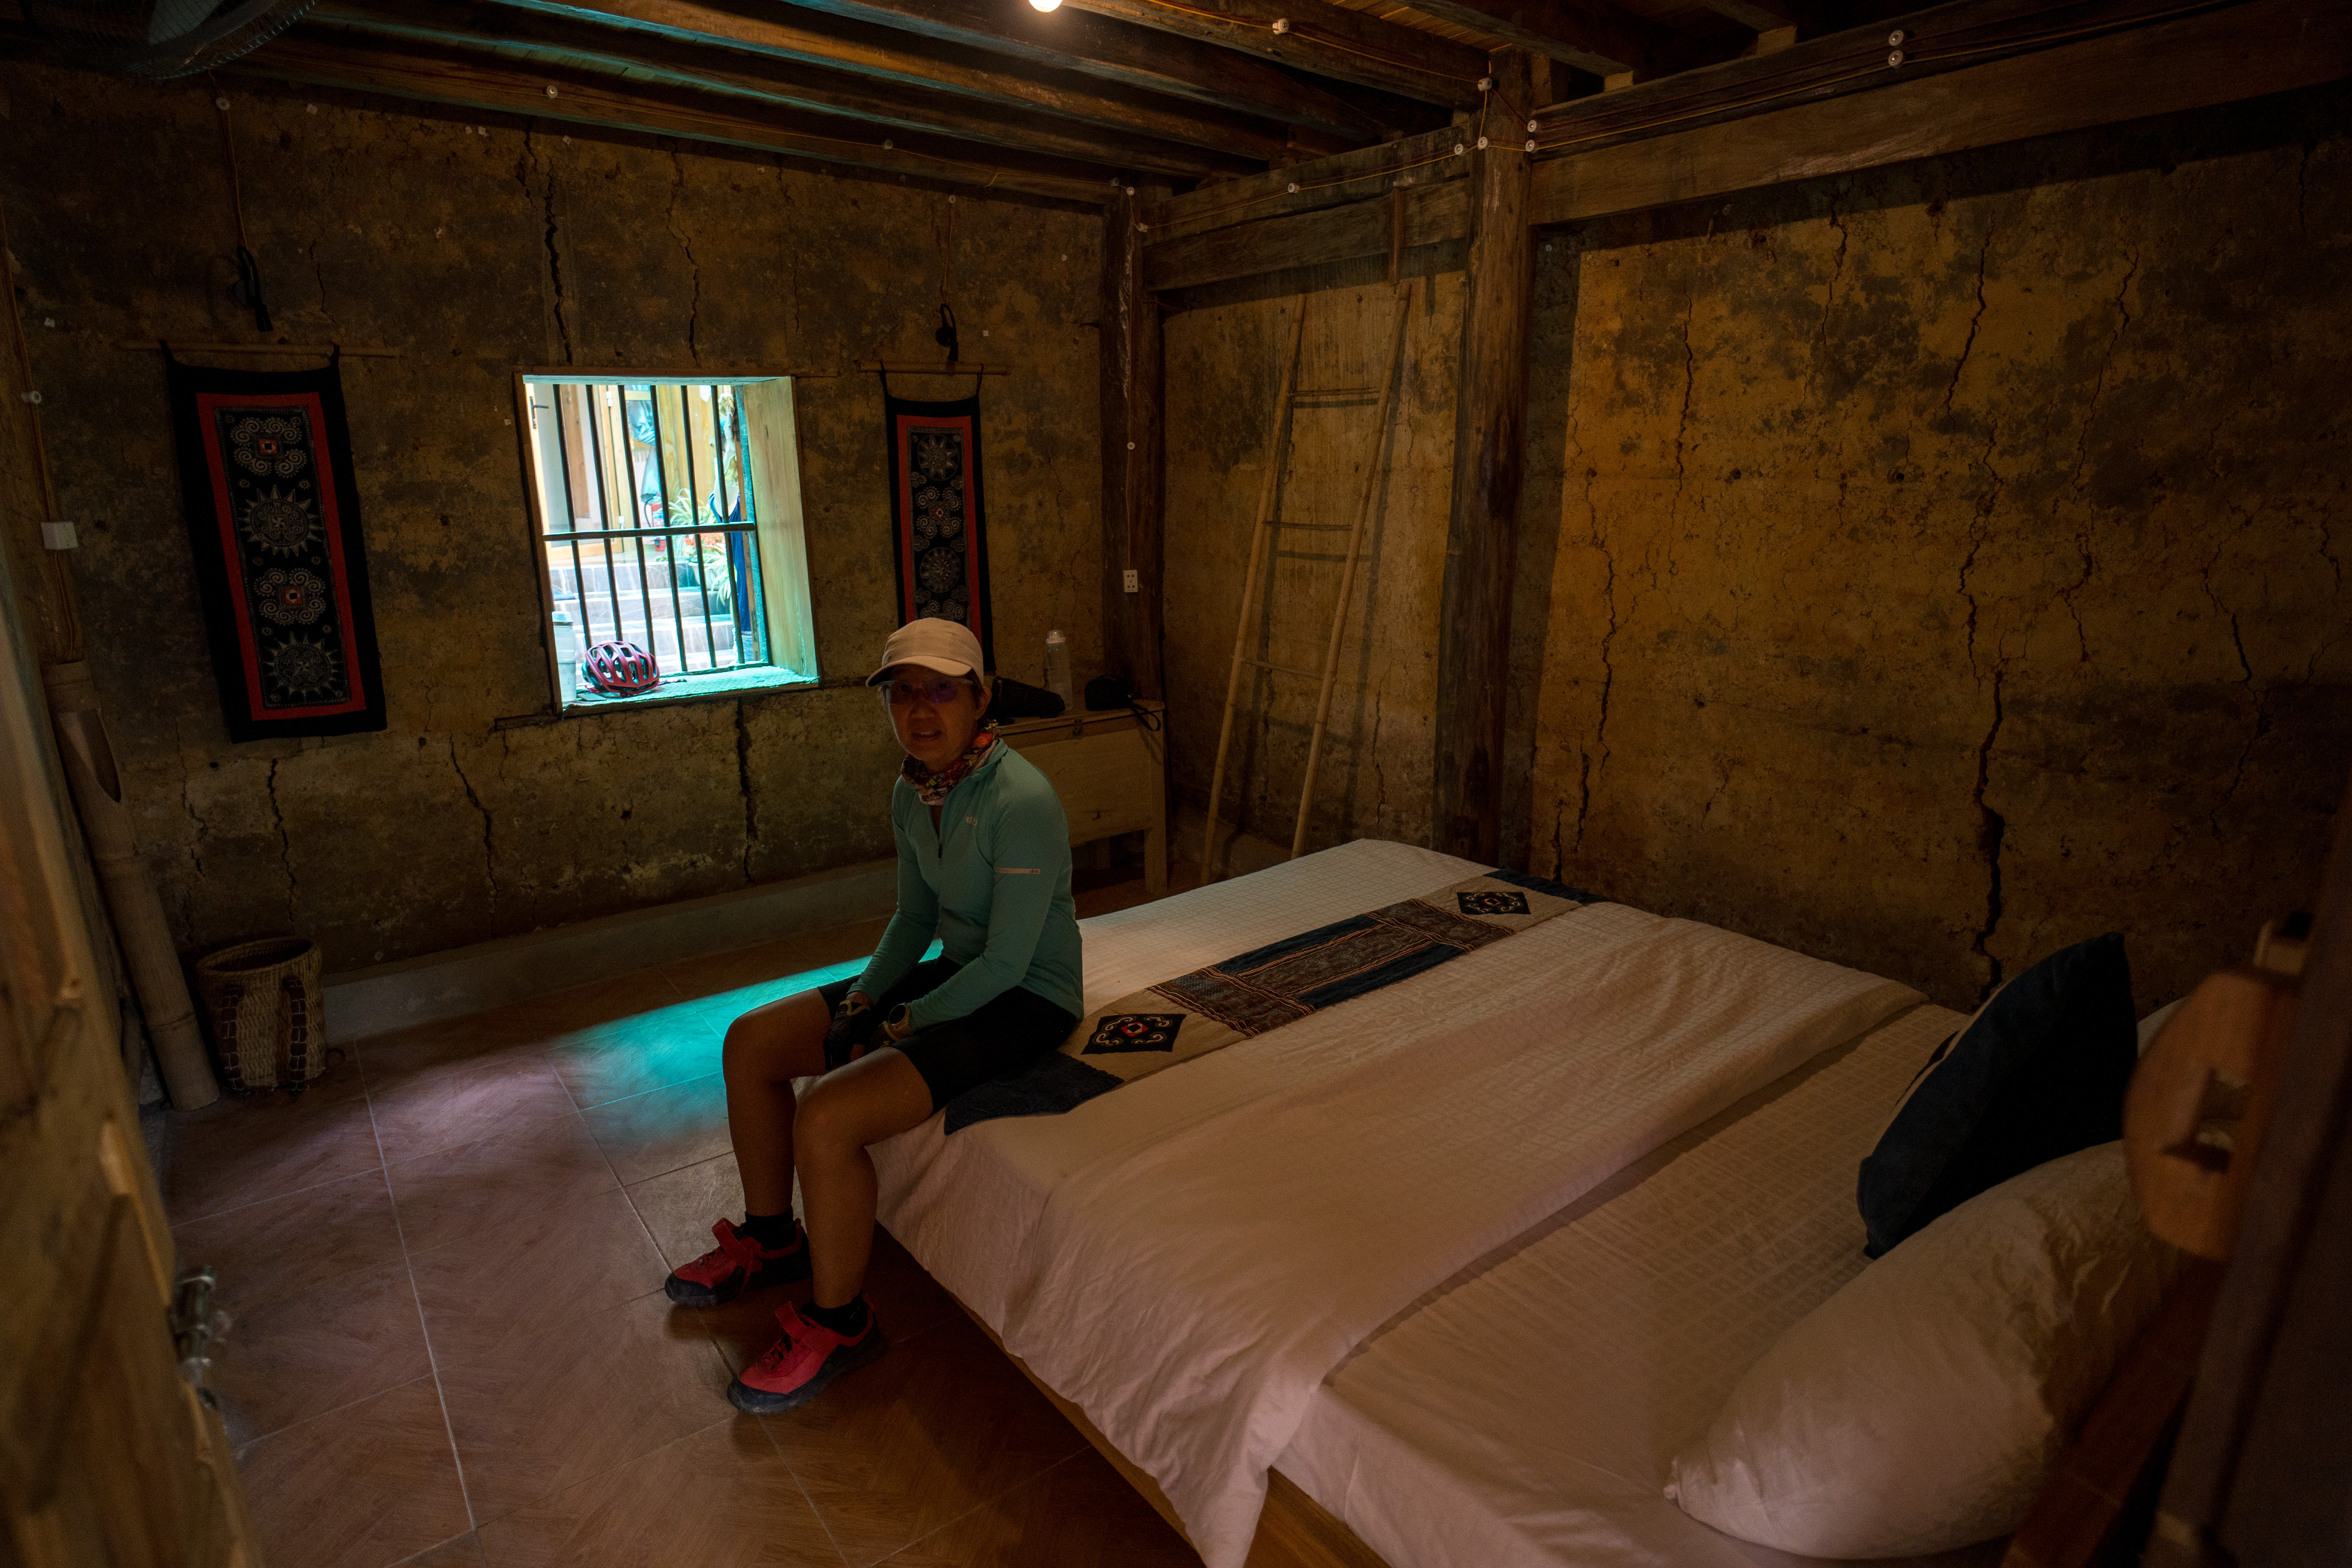
In general, you are not going to be able to bring your bike with you into your room. Usually, the place where you are staying will have a secure place for you to park your bike, either in a garage, basement or backroom. We locked our bikes together in this area with a simple cable lock and were OK.

View from our room at the Kedul Bike Lodge in Santa Cristina

Of the three towns in Val Gardena, Ortesei, Selva and Santa Cristina, Santa Cristina is the smallest and located between the other two. Most of our rides started from Selva, so that’s possibly the most convenient town to stay in. Ortesei is the largest, but also the most touristy. We were happy in Santa Cristina and a cycleway links the 3 towns.

Canazei, a town on the Sella Ronda Loop

We packed pretty light. Generally just one set of clothes for biking, one set for going out, and one set for sleeping. Having a base in Santa Cristina allowed us to do laundry daily and have a fresh seet of clothes.

Lunch at some random cafe with a view of the Dolomites on the Sella Ronda Loop

We bought the Val Gardena Super Summer pass for 7 days, which allowed us unlimited use of the chairlifts and gondolas in Val Gardena for 5 days over a period of 7 days.

Views of the Sella Ronda Trail

Personally, I feel that there are 2 main MTB specific rides: The Sella Ronda Clockwise and Sella Ronda Anti-Clockwise. They are both very different rides, not the same trail ridden in opposite directions, and they both include many small, bike park style runs. The Clockwise loop utilises 8 lifts and about 400m of climbing and over 4000m of descent on a variety of trails.

Views of the Sella Ronda Trail
Views of the Sella Ronda Trail. Photo by Laura

The Anti-Clockwise loop is a bigger ride with over 1000m of climbing and fewer lifts. It has more ‘backcountry’ or wilderness type singletrack. They both run about 75km with 4000m of descent if ridden from Santa Cristina and back. I’d suggest getting an early start as the last lift closes at 5pm or 5:30pm.

Views of the Sella Ronda Trail
Ilya grabbing a drink on the long climb up the reverse Sella Ronda
View of the trail on the Reverse Sella Ronda

We also rode the Seiser Alm loop, but that’s more double track or gravel riding. Great if you just want the scenery without the technical riding.

Made the last gondola on the Sella Ronda Loop Anti-clockwise with 10 mins to spare. And yes, we were the last passengers for the day.

Bring spare brake pads. We brought 2 sets each and ended up using all. We had yet another AXS battery failure (warrantied and exchanged when we got home), so that makes 4 AXS battery failures we have had out of our 6. Although all were warrantied, it makes me question the reliability on trips like this. We carried 2 spare AXS batteries on this trip and 2 CR2032 batteries for the shifters (we had to replace one on this trip). There’s no shortage of bike shops in Val Gardena, but if there’s something specific for your bike, like a spare hanger, I’d bring one with me.

Sassolungo hike

For a shorter 4 day plan, I would suggest getting the 4 day Summer Super Saver Pass, which allows 3 days out of 4 to use the lifts. Ride the Sella Ronda Clockwise on the first day, Ride the Sella Ronda Anti-Clockwise on the last day, and do a short hike, like the Sassolungo, on one of the days in between.

Lori and Ilya getting on the Telecabina Sassolungo. Video by Laura

To do the Sassolungo hike, we took the bus to Passo Sella, then take the coffin-like Telecabina Sassolungo cablecar to the Toni Demetz Alpine Hut, walking down the other side to the Vincenzo Refugio for lunch, then various trails to the Monte Seura chair lift, then more trails to a waterfall, and back to Kedul Bike Lodge in Santa Cristina.

Waterfall near Santa Cristina on the Sassolungo Hike, and yes, we had to hike in our bike shoes!

When it was time to leave, we took a bike shuttle from Santa Cristina to Cortina d’Ampezzo, to resume the Munich to Venice Cycle Route.

Laura giving way to horses and carriage on the Munich to Venice Cycle Route

We had gotten into the habit of packing a sandwich during breakfast to take with us on the ride, and this has always turned out to be a good idea, allowing us to eat something even if we were not near a town or restaurant.

Bridge, Munich to Venice Cycle Route

Resuming the Munich to Venice route from Cortina d’Ampezzo, we stopped for the night at Ponte Nelle Alpi. Our Air B&B, La Locanda, was a former Michelin Bib Gourmand Restaurant, so we made a revservation to have dinner there, and it was not only awesome, but also very reasonably priced. I did feel a little underdressed at most restaurants. Fortunately, I had my Decathlon Forclaz sandals, which I were a cut above the flip flops I normally carry, but I wished I had brought longer shorts (I’ve since bought these Fox Ranger Shorts and will be adding these to the packing list).

Laura finding shade and a cold drink from a convenience store

The further south we rode, the hotter the days got. Early mornings, when we first set off were usually cool, but by early afternoon, it would get really hot, with a chance of thunderstorms by late afternoon. The afternoon thunderstorms could be fierce, with heavy rain or hail, but were mostly brief, and over within an hour or two. We kept our riding days short, trying to reach our destination by 3pm to avoid these thunderstorms.

Leaving Treviso in the morning

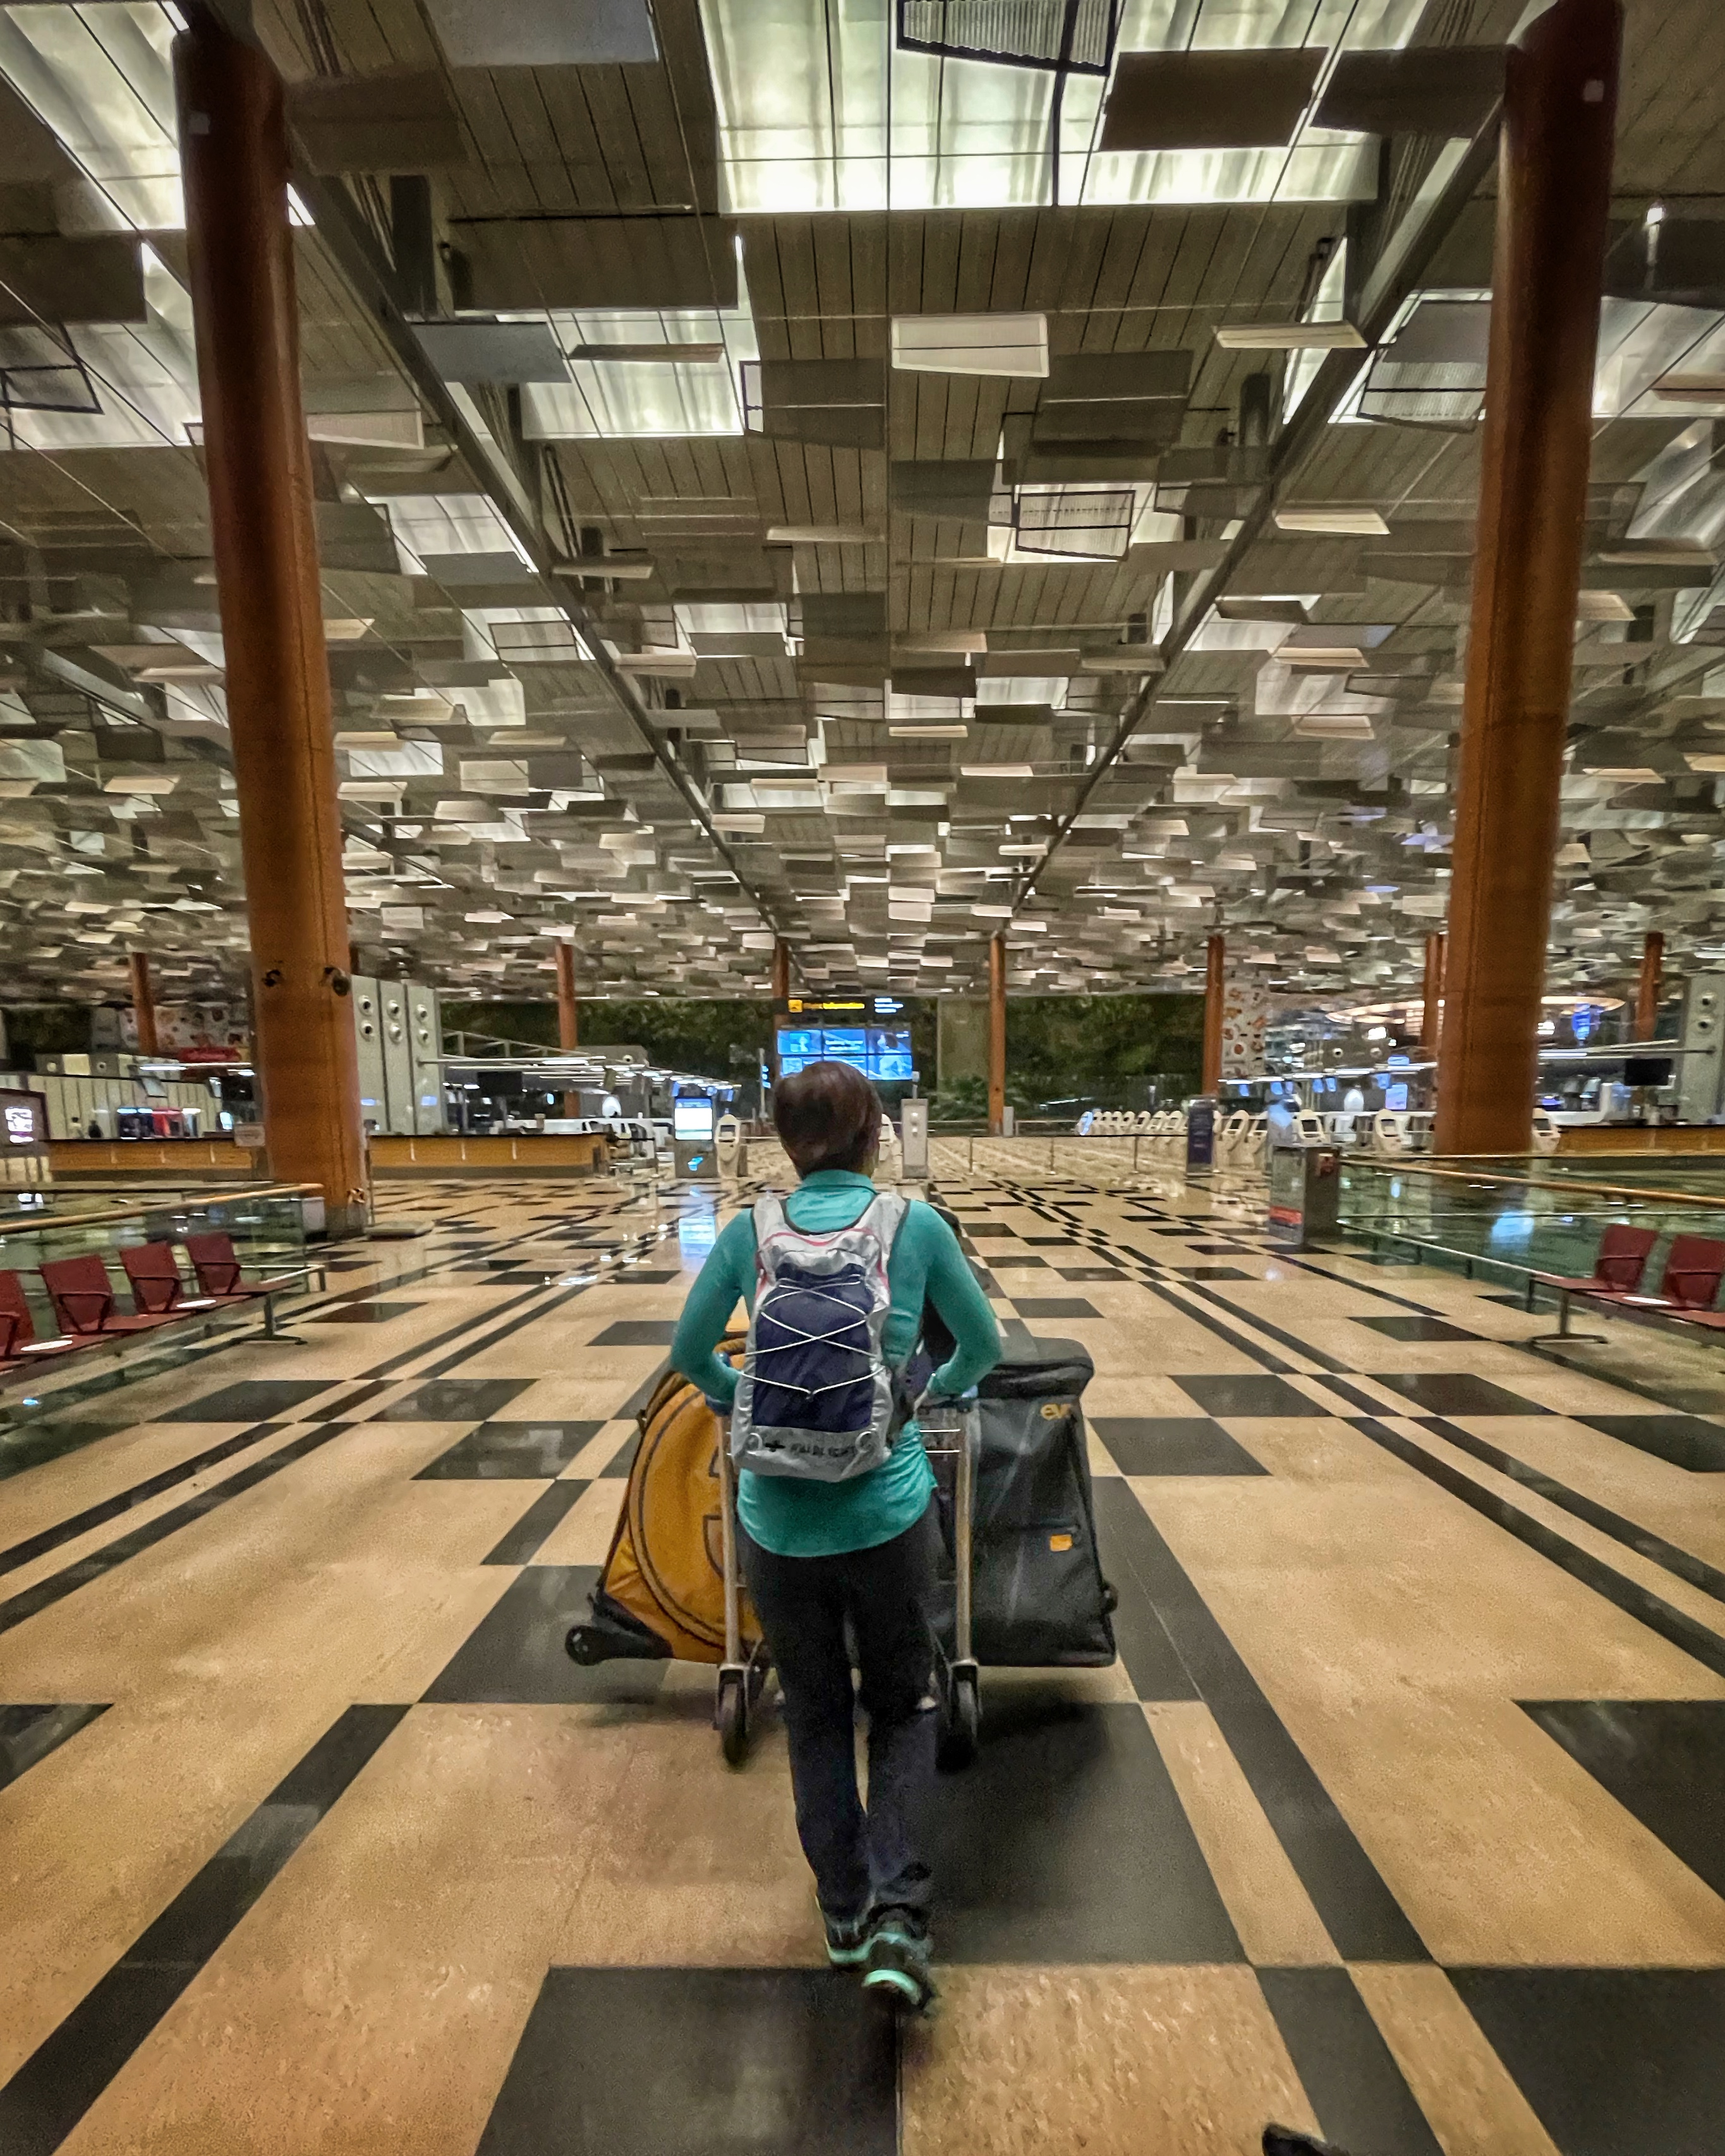
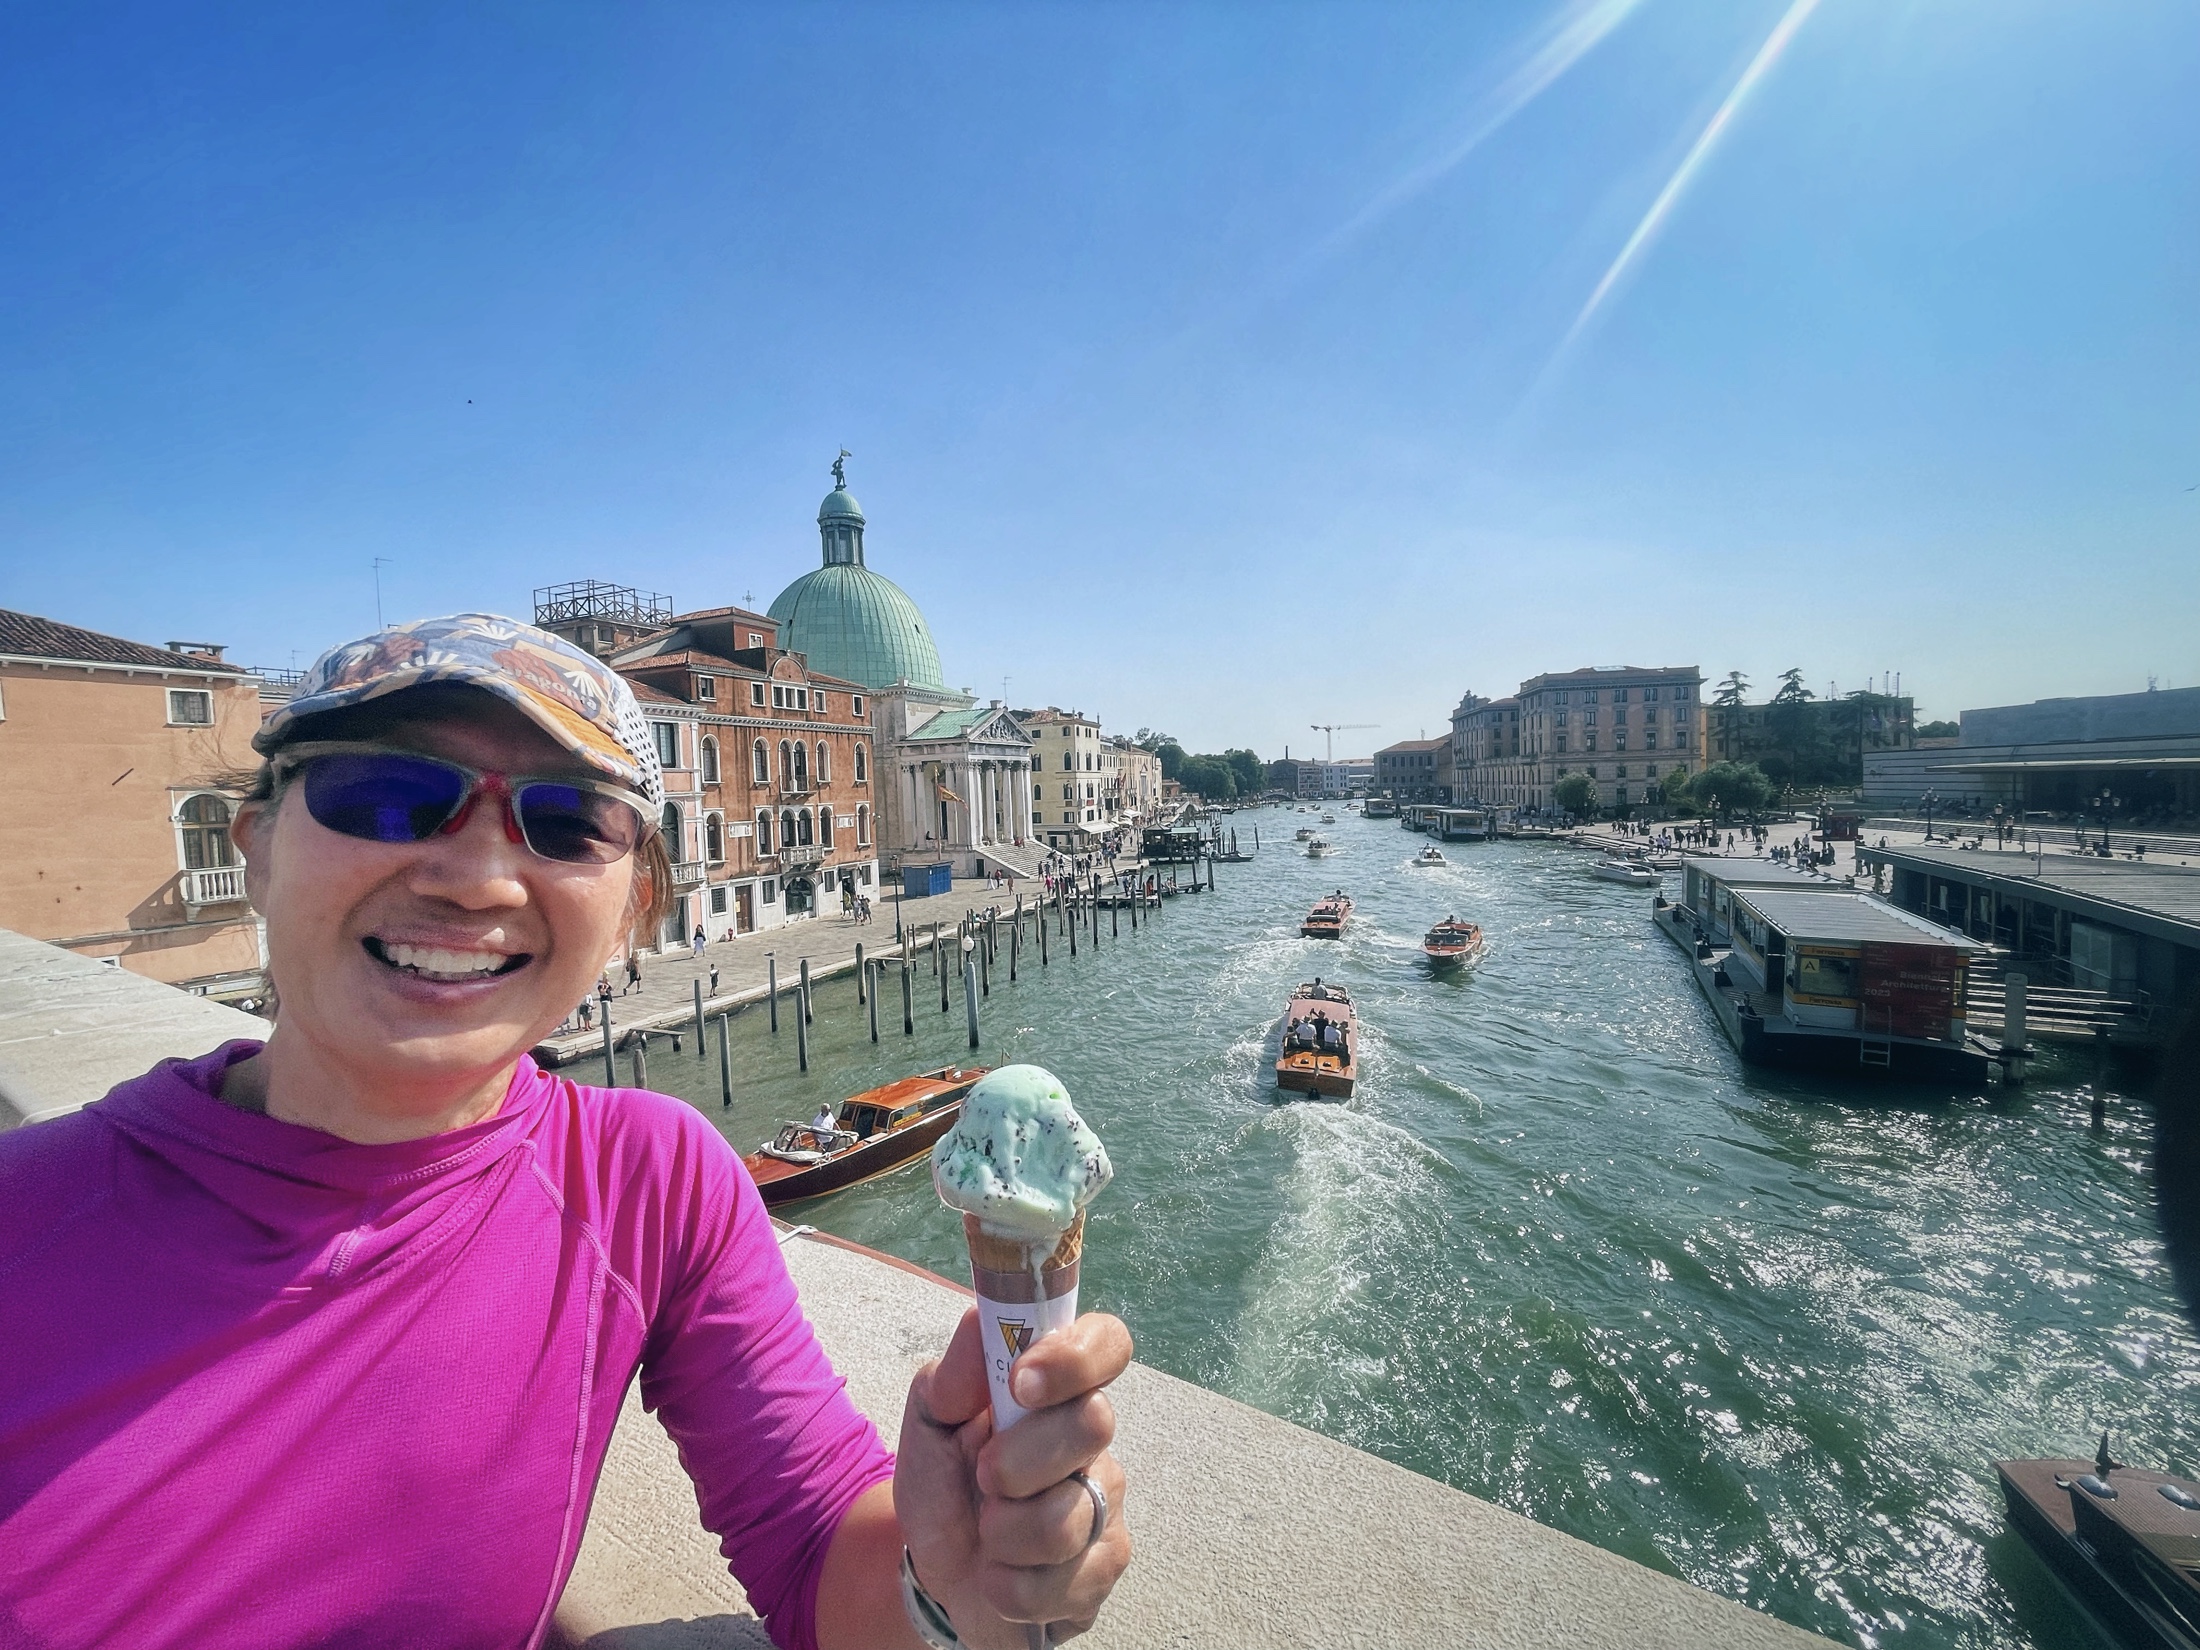
Mestre was the last stop for us. Bikes aren’t allowed on Venice, so we stayed at a hotel in Mestre, parked our bikes there and took the train over to Venice. We said our goodbyes in Venice to Lori and Ilya, who were staying a bit longer, and would then be making their way to the UK. Laura and I would take the train to Innsbruck, then ride back to Munich from Innsbruck.

We made it to Venice! Laura and her quickly melting gelato on the Grand Canal in Venice

How to get back to Munich from Venice? We took the train from Mestre back to Innsbruck and rode the rest of the way back to Munich, but you could take the train the entire way to Munich. The trick is that you can only take the regional trains, which allow bikes. It’s worth going down to the Tren Italia Ticketing office to sort this out. Lori and Ilya continued their ride to Verona. They got bike boxes from the local Decathlon (email them ahead of time and let them know when you are coming to collect the boxes), packed their bikes and flew off to the UK from there.

Great Rides – New Zealand, Part 2

Sunrise, Ghost Lake Hut, Old Ghost Road

Dark skies lay ahead of us on the drive up to Murchison for the Start of The Old Ghost Road. A check with the weather forecast revealed a cold front rolling in from the west. Rather than ride in the cold and wet with no views, we opted to postpone our reservation for the Old Ghost Road huts and car shuttle. Fortunately, we were allowed to do both, with some penalty in cost.

Hot Springs, St James’s Cycleway

After a night in Murchison, we turned east and headed to Hanmer Springs, away from the weather.

The Skyline Steps, Old Ghost Road

It turned out to be a good decision. The weather was great in Hanmer Springs, and we spent 2 nights there. We rode the local trails on the first day, and then the St. James Cycleway to a hot spring on the second day.

Tip: Try the lamb at Number 31 restaurant in Hanmer Springs

Getting dinner ready, Ghost Lake Hut, Old Ghost Road

When we returned to start The Old Ghost Road, we had great weather as well, so the decision and cost to postphone our start was well worth it. We began our ride up through old forests, littered with interesting bits of mining paraphernalia, across high alpine ridges and passes, and finally out through a narrow river gorge. The scenery was both varied and stunning. Mix that in with interesting riding, including having to carry our bikes down 200 narrow and steep steps, and you have the formula for the best of all the long trails we rode in NZ. If you only have time to ride one long trail in NZ, this one is probably it!

Riding The Old Ghost Road

We rode the OGR over 3 days, and spent 2 nights in the huts. The first night at Ghost Lake Hut was completely empty, except for us, but the following night at Specimen Point Hut was completely full. We were the only bikers, with the rest being hikers.

Suspension Bridge along the Mokihinui River, Old Ghost Road

Our 3rd day was a short ride out through the narrow, but scenic, Mokihinui River gorge, getting to our car that had been shuttled up at about 10am.

Riding out along the Mokihinui River, Old Ghost Road. 📸 Laura Liong

We spend the next week or so riding in and around Queenstown. Our last visit to Queenstown was some 30 years ago, on our honeymoon, and a lot has changed. For one thing, its a lot more crowded, and so we based ourselves just outside of downtown Queenstown in Frankton. Frankton has its own restaurants and stores, so we didn’t feel the need to go downtown that often.

Tip: Try the Brisket at the Meat Preachers, Frankton.

Welcome Rock Trail, Queenstown

We spent our last week in NZ riding a few more Great Ride Trails around Queenstown. The Coronet Loop was Awesome! I’d say it was the best one day ride we did in NZ. The Queenstown Trail was a bit overgrown, with some detours. Welcome Rock wasn’t bad, but the climb up to the start was pretty big, and I woudn’t do this again unless I had a 4-wheel drive vehicle that could drive up to the start of the trail. The Lake Dunstan Trail was a nice rest day ride.

Navigating through Thistle on the Coronet Loop. 📸 Laura Liong

Then, it was a long drive back to Christchurch to the motel where we kept our bike bags, for our last night before flying home.

Tip: Consider flying into Queenstown instead. Queenstown is a little more central, and a little closer to more of the Great Rides.

Swooping Singletrack on the Coronet Loop

Photography Notes

My main setup is the compact and lightweight full-frame Sony a7c with the sony 28-60mm kit lens, and a tiny Samyang 18mm lens. Occasionally, I would swop out the 28-60mm lens for a Samyang 75mmf/1.8 for a different look. The setup rides in lightweight pouches stuffed into my riding backpack, a 14l Mission Workshop Hauser. The Hauser is great because it’s so fast to access with the velcro top, and the backpack is rain and splash proof. Current prices for the Hauser are ridiculous, but they normally have a sale around Black Friday.

Lake Dunstan Trail

Bikes and Other Gear

We both used Specialized Epic Evos on this trip. We found them to be the perfect bike fo the longer trails. Light enough to pedal uphill, and capable enough to handle the decents. We use Apidura Backcountry series bikepacking saddle and handlebar bags. They were tough and waterproof, I liked their Downtube Pack for my spares. I stowed 2 tubes, extra sealant, brake pads, derailuer hanger, spare valve, etc in there and strapped it to the bottom of my down tube, which was a good place for it as it was pretty heavy. It was bomber. It stayed put and stayed dry.

Riding Dean’s Bank, a local trail at Wanaka, near Queenstown.

There are more trip photos on my Instagram.

Please comment below if you have any questions. Thank you!

Olympic Game Farm

Whoah bison…

Before leaving the Olympic Peninsula, we got a tip from the manager of the motel we were staying at in Sequim to visit the Olympic Game Farm. He said that the animals roamed freely in an enclosure you drive through and animals like Bison and Elk come right up to your window. Intrigued, we paid a visit to the Game farm and had quite an experience.

Selfie with a Llama

The place has a bad rep with animal rights activists. The big cats and wolves were kept in cages that could have been bigger. No place is perfect and I’ve seen worse. It’s done in the name of profit, so it’s up to you to decide if these guys deserve your dollar.

Hello Elk…

You pay an entrance fee at the gate, and get a map. You should also buy a loaf of supposedly special bread with which you can feed the animals. One loaf is plenty, and we were able to go 2 rounds and still have leftover.

Oh deer…

After 2 rounds, which took about an hour, we left the Olympic Peninsula and headed back to Seattle for the night before flying home the next day.

A Day in Olympic National Park with an Iphone Camera

The moon at sunse from Hurricane Ridge, Olympic National Park, Washington

We spent a day (well, technically it was a little over 24 hours) in Olympic National Park after we completed our Best of the PCT hikes and had a little time to spare. Since that was an ultralightweight trip, I only had my iphone with me, and so had to make do with it and capture some landscapes with a little creativity.

Sunset, Hurricane Ridge

We drove out to the park in the evening after dinner, and hiked up Hurricane Ridge to catch sunset. An it was a gorgeous sunset, with all sorts of colors lighting up the sky, and no shortage of subject matter.

Deer on Hurricane Ridge at Sunset

I was on an ultralightweight backpacking trip, and so I only had my iPhone with me to take photos. These days, I’m finding less of a need to carry a lightweight camera with a small sensor, like my Sony RX100, and simply rely on the iphone’s camera on such ultralight trips. I still carry and use my full-frame Sony camera on less demanding trips, and when I want high quality output. I wrote about that here.

Hikers at Sunset on Hurricane Ridge

The iphone already works some magic into each shot, so I didn’t have to do much post processing. The key to getting great shots from my phone’s camera is to make sure the lens is clean. I wipe off the lens before each shot to make sure there’s no grease, sweat or water on the lens.

Looking towards the Pacific Ocean from Hurricane Ridge

The next morning, we drove back into the park. Our intention was to visit the Hoh Rainforest, but there was a queue to get into the parking lot. We waited about 45 minutes, and it looked like there was still another hour to wait, so we bailed and headed out to Rialto Beach a little early. The tides worked in our favor as we took our time walking down to the Hole-in-the-Wall, looking at the multicolored stones the Pacific had washed in.

‘Hole in the Wall’ at Rialto Beach, Olympic National Park
Purdy colored stones washed up on the beach. Leave them on the beach please. I believe it’s illegal to remove them from National Parks.

After dinner, we hiked up Mt. Storm King to catch the sunset, and ended our visit to the Olympic National Park with a hike back down in the dark.

Sunset at Mt. Storm King, Olympic National Park

Best of the PCT, Part IV

Alpine Lakes Wilderness Loop

Home for the night, Ridge Lake


This was the last of our ‘Best of the PCT hikes’. We had a couple of days in Seattle before driving out to Snoqualmie. From the PCT parking lot just north of town, our intention was to take the Old PCT (Cascade Crest) trail down to Goldmyer Hot Springs, then make a loop by heading east and returning southbound on the new PCT trail across the Kendall Katwalk and back to Snoqualmie, a 55 mile (88.5km) loop.

But just a little way down from Red Pass, the Old PCT trail became to sketchy to continue, so we bailed on that and made it an out and on the PCT to Spectacle Lake and back. Caught some wind and rain on day 4, but thankfully, cleared up for our hike out on Day 5.

Looking down at Spectacle Lake, our home for the night
Swimming in Park Lake

How does this series of short hikes compare to a complete through-hike of the PCT? Well, Other than the commitment of being out here for much longer, and missing out on the experience of trail angels, trail magic, etc; the main difference was the speed, ease and amount of ground you can cover. Once I got my trail legs during my thru-hike, I tended to cover about 28 miles (45km) a day. That’s about 2-3 times the distance I covered on this trip. It meant I got to see a lot more in a single day on my thru-hike. If a thru-hike is a 4-year college education, then these series of hikes would be like taking a few night classes.

The Kendall Katwalk

It was a great trip, being able to revisit some beautiful places and share them with my wife and friends, given the limitations we had (driveable from an international airport, were loops, did not require advance booking of permits or require carrying abear cannister).

A bit of rain on Day 4

Best of the PCT, Part I

Since completing my through-hike of the Pacific Crest Trail in 2018, I had been looking for a way to share the experience with my wife. The idea was to find the most scenic parts of the trail with the following requirements:

  • Accessible from an international airport
  • Did not require advance booking of a permit
  • did not require carrying a bear canister
  • a maximum of 5 nights out
  • loops to start and end at the car
  • Had to include part of the Pacific Crest Trail, obviously 😉
The 3 Sisters Loop, Oregon

We ended up selecting 4 hikes from Central Oregon up to Washington, and we called these, our ‘Best of the PCT’ hikes. These were:

  • Goat Rocks Wilderness, Washington, 3 Days
  • The 3 Sisters Loop, Oregon, 5 Days
  • The Timberline Trail, Oregon, 4 Days
  • North Cascades Loop, Washington, 5 Days

The plan was to fly into Seattle, pick up our rental car, drive to REI to buy canister fuel for our stove, some food, and get a Northwest Forest Pass, which is required for parking at the trailheads for most of the trails we were planning to hike. Then hit a supermarket, pick up the rest of the food and a mini Bic lighter. Then hit the road early the next day for the first trail.

The 3 Sisters Loop, Oregon

At the time I planned this in 2019, the 3 Sisters Loop did not require advance booking of a permit. It does now for certain times of the year. See this link for more information on when you need a permit and how to get one. Fortunately, we managed to snag one the week prior to the start of our hike when more permits are released.

We had wanted to start with another hike in Washington, but in mid July 2022, there was still a lot of snow on it, so we drove down to the southernmost hike on our list, the 3 Sisters Loop, near Bend, Oregon.

Starting the hike on the morning of Day1

This turned out to be a pretty good shake-down hike. Not too much elevation change and still a lot to see. We parked and started our hike from the Lava Lakes Camp Trailhead. That was the shortest drive from Bend, but as it’s a loop hike, there are a number of options on where to park and where to start.

Day 1, Creek Crossing with dry feet

We decided on an anticlockwise loop, so the first day was spent hiking through a lot of dead trees, a few ‘feet dry’ creek crossings, and fighting mosquitoes. We ended the day with a nice campsite next to Alder Creek.

Enough mosquitoes for you?

For us, it was a 5 day hike, and the scenery started looking better from Day2. We eventually connected with the PCT near the southernmost point on the hike and followed that all the way back to the car.

Morraine Lake on Day3
Views of Mt Washington, 3 fingered Jack, Mt Jefferson, and Mt Hood on Day4

After the hike, we drove back to Bend for a couple of days rest before heading out for the next hike.

Hello deer…

Continue to Part II

The Big Squeeze: Full-Frame compared to an iPhone Camera

As phone cameras get better, and full-frame cameras get smaller and lighter, it’s going to put pressure on the sales of cameras with small sensors.

Below are 2 images. One captured by my wife with her iphone, and the other by me with the Sony a7c, a lightweight full-frame camera with the kit lens. How different do they look to you? And do the differences matter to you? My thoughts below.

Apple iPhone 11 Pro Max, 13mm f/2.4, ISO 80, 1/120. ©Laura Liong
Sony a7c, 28-60mm f/4-5.6 at 28mm f/4, ISO 100, 1/500

Both images were taken ‘best effort’, with different lenses, cropped and edited, so it isn’t an apples to apples comparison. It’s more to give you an idea of what to expect, from the lightest weight option and a full-frame option for adventure photography.

My iPhone 12 Pro is an extremely convenient camera. It houses 3, fixed aperture lenses, an ultrawide 14mm, a wide 26mm and a ‘normal/short telephoto’ 56mm lens. Other then the framing, not much thought goes into creating an image, and Apple works some magic into the completed shot, so if you don’t post-process your images, they’ll still look very good. The iphone is a proven choice to capture adventure images. I’ve written about it here: https://adventurenomad.wordpress.com/2022/03/10/adventure-photography-with-an-iphone-bikepacking-southern-germany/https://adventurenomad.wordpress.com/2022/03/10/adventure-photography-with-an-iphone-bikepacking-southern-germany/

This summer, I took only my iPhone to record images of my backpacking trip to revisit some trails of the PCT in Oregon and Washington. The bottom line is that I knew the shots would just be viewed on social media, and the iphone would do the job. You can view the images from that summer trip on my instagram account. Here’s a link to a sample: https://www.instagram.com/p/CgdhDC5LRyW/?igshid=MDE2OWE1N2Q=

The shot above, taken with the Sony a7c with the kit lens, has better subject isolation, higher resolution and generally fewer flaws. For trips where I might want to print or have my images published, I would still bring a camera, if space and weight allows, that would be the a7c and maybe 2-3 lenses, otherwise, the RX100.

Hiking, Biking and Photographing the Ring of Fire

Riding into the rising sun on the rim of the caldera . Sony a7c, Samyang 18mm, f/11, 1/250 sec, ISO400

I’ve been into adventure photography since the 1980s. It was a way of being able to share my experiences with family and friends. Back then, I shot film, and my camera’s were manual exposure and manual focus. They were simple, lightweight and rugged, but slower to work with, and I missed a lot of shots. As the years passed, and I transistioned to digital, advances in technology meant more ‘keepers’, but also usually came with an increase in size and weight. It got to the point where the camera was getting in the way of my participation of the adventure, and taking away from the fun of it. On this trip, I carried a lightweight full-frame camera body, the Sony a7c, with a few lightweight lenses, and for the first time in a long while, I felt the camera become a part of the adventure, rather than a hindrance.

Disclosure: Although Sony Singapore lent me a demo a7c camera that I recently took on a trip to bikepack the Ha Giang Loop in North Vietnam. I bought and paid for this camera and all the lenses with my own money. There are affiliate links in this post. Clicking on or buying something using these links won’t cost you anything, but I may get a small commission.

Beginning the steep and slippery descent to the bottom of the Mt. Ijen crater. Sony a7c, Samyang 18mm, f/2.8, 1/15 sec, ISO6400

We began our week long trip from Surabaya, the second largest city in Indonesia, and drove 7 hours out to Mt. Ijen which is on the eastern tip of Java island. Ijen is closer to Bali, but if you’re doing both Ijen and Bromo, and it is worthwhile doing both, Surabaya is more convenient. We did a short ride there, which ended on a black sand beach looking out to the island of Bali. But the main purpose of coming to Mt. Ijen was to climb into it’s crater, where the sulphur mining takes place, and view the ‘blue fire’, a spectacle of sulphur combusting that is best viewed in the dark of night.

A sulphur miner at work at the bottom of the Mt. Ijen crater at night. Sony a7c, Samyang 18mm, f/2.8, 1/15, ISO1600

I was keen to take the a7c to Mt. Ijen because of it’s compact size, low weight and weather proofing, but mainly for it’s good performance in low light and killer autofocus, which seemed to make it a great choice for capturing the action at night, or really, just a good adventure camera in general.

A video of the ‘Blue Fire’ captured by a miner using Laura’s iphone
Laura climbing out of Mt. Ijen’s crater before sunrise. Sony a7c, Samyang 18mm, f/2.8, 1/15 sec, ISO4000

In the morning, we napped in the van as we drove the 5 hours back west to Mt. Bromo, another active volcano. I had ridden the trails before, here and here, and was keen to share them with Laura. We weren’t disappointed! With the volcanic landscape, the scenery was spectacular, and the riding, while a bit slippery, was flowy and good.

Riding singletrack on Cemero Tigo Trail. Sony a7c, Samyang 18mm, f/2.8, 1/800, ISO100

The Camera

My camera is a Sony a7c which weighs 509g, and is about 20% lighter than a comparable full-frame camera. It made sense to me to keep the weight light and pair the camera up with some compact, lightweight lenses. I chose to bring the kit zoom lens that came with the camera, Sony’s 28-60mm f/4-5.6 (167g), and 2 cheap, lightweight and tiny prime lenses: Samyang’s 18mm f/2.8 (145g) and Samyang 75mm f/1.8 (230g). That made a compact, versatile and relatively lightweight kit.

The kit – From bottom left clockwise: Sony a7c in silver with 28-60mm kit lens, Samyang 75mm f1.8, Samyang 18mm f2.8, Leofoto MT-03 tripod with MBC-18 micro ballhead, Neewer 10mm Extension Tube

We would spend 4 days at Mt. Bromo, staying in Cemoro Lawang, which is about 2200m above sea level, so it’s relatively cool. We rode trails with names like ‘Sea of Sand’, ‘New Zealand’, ‘Cemero Tigo’ and ‘5cm’. Mostly, the trails are singletrack winding through villages and farmland, or through forests of pine, mahogany or teak.

Riding singletrack through farmland. Sony a7c, Samyang 18mm, f/5, 1/250, ISO400

I typically carried 2 lenses and the camera in a hip bag, usually the Samyang 18mm ultrawide lens and the Sony 28-60mm kit zoom. Neither of the Samyang lenses are weatherproof, but the Sony lens is weatherproof, which can come in handy if the weather turns bad. If it’s low light, I may swop out the zoom for the 75mm f/1.8, and carry a lightweight tripod.

Laura digging up some fleece gloves during a wet and cold morning on the ‘Sea of Sand’ at the bottom of the crater. Sony a7c, Sony 28-60mm, 28mm, f/4, 1/1250, ISO5000

The Lenses

The Sony 28-60mm f/4-5.6 kit lens proved to be surprisingly sharp and useful, being able to capture a variety of shots from portraits to macros (close focus) in a compact, lightweight and weatherproof package.

We crashed this boys birthday party! The trail was blocked by the event, and as we were pushing our bikes throught the event, we were invited in for food and drinks! Sony a7c, Sony 28-60m, 58mm, f/6.3, 1/250, ISO10000
Riding through village singletrack where a variety of crops are grown, I grabbed a close up of these coffee beans with my Sony a7c, Sony 28-60mm at its closest focusing distance. 60mm, f/5.6, 1/4000, ISO10000

An ultrawide lens like the Samyang 18mm f/2.8 is my most used lens. Not only is it wide, but at f/2.8, it’s relativbely fast, and useful in low light situations as well. The Samyang 18mm f/2.8 is incredibly lightweight, weighing in at just 145g, is quite sharp, and is cheap as it frequently goes on sale at Amazon. The downside is that it’s not weatherproof.

Last look at the 2 volcanoes spewing smoke, Mt. Bromo and Mt. Semeru before we dropped down the other side of the caldera rim on ‘5cm’ trail. Sony a7c, Samyang 18mm, f/2.8, 1/1000, ISO250

The Samyang 75mm f/1.8 is a short telephoto lens. It’s my least used lens, but useful to create separation between your subject and foreground or background or for portraits. It is light, cheap, very sharp, but not weatherproof. From time to time, it goes on sale at Amazon. It weighs 230g,

Laura capturing the sunrise at Cokroniti Viewpoint. Sony a7c, Samyang 75mm, f/1.8, 1/4000, ISO1600
Portrait of a pine sap collector. Sony a7c, Samyang 75mm, f/1.8, 1/250, ISO320

Rounding out my kit is a small tabletop tripod (244g), the Leofoto MT-03 with a tiny ballhead, the Leofoto MBC-18. Ever since my through-hike of the Pacific Crest Trail, I’ve grown to love the low angle shots from my mini tripod, and can make do with it when keeping weight light is a priority. None of my lenses focus very close, so to get close up shots, I may also carry a Neewer 10mm extension tube (33g). It comes in a set of 2, but I may carry just one. I use that mainly on the 28-60mm zoom. Also in my bag is a chamois to wipe off condensation or moisture from the lenses or body.

Riding through a pine forest on our last day. Pine sap is collected and sold. Sony a7c, Samyang 18mm, f/2.8, 1/1000, ISO250

On our last day, we were due to fly out in the evening, so we did a ride that dropped down the side of the crater to Dingklik and Tutu Welang, which put us in range for a short 1 1/2 hour drive back to Surabaya for our flght home in the evening. A perfect ending for a short, week-long getaway.

Laura riding on a black sand beach of Pantai Boom on the eastern tip of Java island, looking out to the island of Bali. Sony a7c, Sony 28-60mm, 60mm, f/11, 1/250, ISO100

Bikepacking the Ha Giang Loop, Northern Vietnam

Bikepacking the Ha Giang Loop. Sony a7c, Samyang 18mm f/2.8

Epic scenery, killer climbs, village life… What’s not to like? The Ha Giang Loop in Northern Vietnam is only 300km (about 190 miles) long, but packs in a whopping 8000m (about 26,200’) of elevation gain. The climbs are steep and sustained, and so the route is normally done on motorbikes following the main roads in 2 to 4 days. We planned out a route on Komoot, which mostly followed the main loop, but occasionally leaving it for small roads and trails. It worked out to 7 days by bicycle, which kept the days shorter and the hills more manageable.

The route on my navigation app, Mapout

Getting There

Hanoi is the closest major city with an international airport. There are buses which go from the airport to Ha Giang. There are a number of Hostels close to the bus station in Ha Giang. We stayed at the Ha Giang Hostel. The hostels can help you book your bus tickets. We were short on time, so a local friend helped to arrange a minibus pickup from the airport to Ha Giang. Journey time was about 6 hours.

There are plenty of places you can rent a motorbike, but I don’t know if you can rent a bicycle in Ha Giang. Anyway, we brought our own, assembled them in the evening of our arrival, and set off early the next morning.

The Karst landscape scenery is a major attraction of the Ha Giang Loop. Sony a7c, Samyang 75mm f/1.8

Day 1: Ha Giang – Tam Son

People get up early and by 6:30am, it was bustling in Ha Giang. Once outside of town, it became noticeably quieter. At about 8km from Ha Giang, we left the main QL4C road by taking a right turn across a small bridge, which put us onto backroads, which became village singletrack, before eventually rejoining the main QL4C route.

Village singletrack just before rejoining QL4C

We rolled into Tam Son at about 2:30pm, as the heat of the day began to peak. We took an afternoon nap, went out for an early dinner, then went to bed early. It had been a tough day, although the stats don’t show it. 45km, 1400m elevation gain. A great introduction to what lay ahead for us. https://www.komoot.com/tour/714643108?ref=itd

Road repair works held us up for about 45 mins just before reaching Tam Son

Day 2: Tam Son – Yen Minh

We woke up at 5:30am, trying to get an early start to beat the heat, and also to cater to time lost in unpredictable road repair works.

Towns are usually at lower elevations, in the plains close to a river, so there’s usually a big hill to climb as soon as we leave town, and the idea of beating the heat by climbing that hill as early as possible was a good one, and that would be our routine for the rest of the trip. Rising between 5:30 and 6:00am, get breakfast, and rolling out of town before 7am.

At the top of that first big climb

We found a great place for the night, Bong Bang Homestay, where we had a charming room and had dinner with the host family. A bit of an easier day. 35km, 816m of climbing.

Our charming room at the Bong Bang Homestay

Yen Minh – Dong Van

This was to be our hardest day. We decided to simply follow the main QL4C route today, with no offroad detours. We took frequent breaks during the climbs. The goal was simply to survive today’s ride.

Little critters on the road

It turned out to be quite a longish day, and we were pretty tired by the time we reached town. It turned out to be the most touristy town along the route. There was supposed to be a pizza place, but it had not yet reopened from the pandemic. We found that quite a few places were in the process of reopening, and there were not very many international tourists yet. 47.5km, 1750m of climbing.

Laura grabs a shot of the road we just climbed, while kids admire our bikes

Dong Van – Meo Vac

This was a short riding day, with only 22km and 700m of climbing, but it would be our most scenic day.

Riding the ’Sky Path’. Sony a7c, Samyang 18mm f/2.8

About 7km out of Meo Vac, we detoured onto the ’Sky Path’, a scenic concrete village doubletrack that would become twisty dirt singletrack as the path rejoined QL4C. A highlight that should not be missed!

Laura and a local tourist in costume grab a wefie on the river cruise at sunset. Samyang 18mm f/2.8

At Meo Vac, we found a place to stay with cute, round huts, and we could secure our bikes outsite the hut, then we took a taxi down to river for a sunset cruise.

Cute huts, our accommodation in Meo Vac

Meo Vac – Mau Due

Originally, we had planned to bypass Mau Due and ride to Du Gia, and take a rest day there. But during the course of the previous days, we decided to break up the stage into two smaller days, and not take a rest day.

The star marks the start of the detour, and it rejoins the main route near the top of the beak

At about 23.5km from Meo Vac, we took a detour through a village. This not only bypassed some road repair works, but was also quite pretty riding pass black rocks. The path is not shown on any map, but I marked the start of the detour with a star near a ’duck’s head’ feature of the road, and the detour rejoins the main road at the ‘beak’.

Riding the detour between Meo Vac and Mau Due

Mau Due wasn’t anything exciting, but was found a pleasant enough place to stay and a nice place to eat, overlooking the river and rice padi fields. 35.3km, 656m

The view at sunset from the restaurant at dinner. Shot with my iphone.

Mau Due – Du Gia

Leaving Mau Due was another big climb. We were used to the climbing by now, but the legs were still tired. We had the usual ’Pho’ (rice noodle soup with beef or chicken) for breakfast, and packed a ’Banh Mi’ (Vietnamese sandwich) for a snack on the road.

Spring Rolls for Dinner in Tam Son

As a rough guide, the small restaurants along the route tend to sell only one dish. If it’s ’Pho’, that’s generally all they sell. One shop may sell just ‘Beef Pho’, and a nearby shop sells ‘Chicken Pho’. People wake up pretty early, and at 6am, shops and breakfast places are open. We tend to ride down the main street of town, and if we see people in a restaurant, we take a look at what they are eating and if it looks good, we sit down and have the same thing. Generally, we would have a ‘Pho’ for breakfast, pack a ‘Banh Mi’ for a snack on the road, have ‘Com Rang’ (fried rice) for lunch, and for dinner, steamed rice with mixed dishes. There weren’t any western options.

The view from our bedroom at the Du Gia Hostel

Du Gia was probably the prettiest village on route. Set along the banks of a large river, with a lot of homes set amongst the padi fields. We stayed at one of these, the highly rated Du Gia Hostel. 37km, 1264m.

Du Gia – Ha Giang

We didn’t have much information about the condition of the most direct road back to Ha Giang, the TL176 and QL34. Some reports we read indicated it was in bad condition, but we figured a bad road would make for some fun mountain biking.

We rode up the first hill out of town into a heavy fog, which cleared up on the descent. The rest of the day’s ride was very pleasant, cool, maybe a little drizzle on mostly quiet, rolling roads. We got into Ha Giang about two in the afternoon, packed up or bikes, and ordered pizza for dinner. 71.9km, 1535m.

Riding quiet roads back to Ha Giang. Sony a7c, Samyang 75mm f/1.8

The Gear

Ha Giang is generally warm, unless it rains or at one of the towns at higher elevation. We didn’t pack much. One set of riding clothes that we washed everyday and let dry overnight, and one set of clothes for sleeping. Toiletries in a small ziplok bag, iPhones for navigation, a charged powerbank, rain jacket and wind pants, a buff (never used), a spare pair of socks (never used), a light fleece top, and flipflops/crocs. We packed all this into Revelate saddlebags strapped to our hardtail mountain bikes, setup tubeless with fresh sealant added just before the trip.

We carried the usual tools (multitool with chainbreaker, pump, tire levers) and carried the usual spares (2 tubes, brake pads, chain link, hanger). We had 2 Petzl Binddi headlamps as front lights, and 2 lezyne rear lights. We also carried a small cable lock to secure the bikes. All this was stored in a Revelate Gas Tank on the top tube of my bike, except for the tubes, which went into my saddlebag.

Laura carried our passports and documents, our ‘Pokefi’ wifi hotspot, and money in a small handlebar bag. We also had a stash of emergency food (6 snickers bars, 6 instant coffees, little satchets of electrolyte drink mixes, a couple of fig bars and a bag of peanuts.

For camera gear, I carried a Sony a7c, the lightest interchangeable lens, full-frame camera with in-body image stabilization (on loan to me thanks to Sony Singapore), paired with 2 tiny lenses from Samyang: the 18mm f/2.8 and 75mm f/1.8. With a total weight of just under 900g, this was by no means lightweight, but it was manageable. I carried these in a roll top hip pack to isolate them from bumps and shock. I loved the camera, but on hindsight, I should have brought a different lens setup. I also brought a tiny tabletop tripod, which I carried in the saddlebag.

It’s too complex to get into that here but if anyone is interested, I’ll have a separate write-up for the Sony a7c for lightweight adventure photography, compared to point and shoot cameras with a 1″ sensor, like the Sony RX100s, and phone cameras.

Adventure Photography with an iPhone: Bikepacking Southern Germany

As soon as the pandemic would allow, my wife, Laura, and I left the tiny island of Singapore and headed to Southern Germany, hoping to catch the last rays of Summer, for a couple of weeks of ’credit card’ bikepacking. I used my iPhone 12 Pro to document most of that adventure trip.

Leaving Singapore as soon as it practical during the pandemic. The usually bustling Changi Airport was mostly deserted.

The newer iPhones lend themselves well to adventure photography. They are compact, weatherproof, always at hand and, if you always have your phone with you, incur no additional weight. My iPhone 12 Pro has 3 lenses which cover a useful focal range: an ultrawide 13mm f/2.4, wide angle 26mm f/1.6 and a 52mm f/2 which Apple calls a ’telephoto’.

Munich, here we come!

We did a short ’credit card’ bikepacking trip out of Munich, taking as much trail and gravel roads as possible. It was mid September 2020, and we managed to catch the last of summer.

Bad Tolz, along the banks of the Isar River

I shot with the default settings, which allowed the iphone to work it’s computational photography wizardry and kept the workflow easy, just frame and shoot. Still, I went and processed the images further with Snapseed and added a filter from Darkroom to taste.

A fixed aperture on my iPhone means I can’t close down the aperture to create a sunstar. This sunstar was digitally added in post processing with the Lens Distortion App.

Shooting with the iPhone has a few drawbacks. It’s not very good in low light, the images don’t stand up to heavy processing and control is limited. One of the drawbacks is that the aperture on the iphone is fixed: meaning I can’t close the aperture to create a sunstar. However, I found a workaround for this by using a 3rd party app called Lens Distortions to digitally add a natural looking sunstar in post production.

Using the ultrawide lens on my iphone to shoot Partnach Gorge near Garmisch

The convenience of having a built in ultrawide lens on my iPhone 12 Pro is a game changer for me. Previously, I had to use an add on lens to get a an ultrawide or fisheye effect. It was a bit more cumbersome and the additional glass affected the image quality.,

A huge boon is being able to quickly pull the iphone out of a pocket and shoot one-handed while continuing to pedal my bike and not stopping

Here are some other images from that trip:

Weatherproofing is another huge advantage of the iphone. It’s great to be able to keep the iphone handy and shoot in inclement weather.
Komoot, where are we? Because I use my iPhone for navigation, it’s with me in the outdoors anyway, and so there’s no additional weight of having to carry an additional camera.
The limited controls on the iPhone can be both an advantage as well as a disadvantage. In this image, it worked out for me, because it was pretty dark in the forest, and the shutter speed that was automatically selected by the iphone was slow enough to slightly blur the rider, to show some motion. The low light has caused the ISO to be pushed up to ISO1250, which has caused the general mushiness and loss of detail to the image.
The bridge was out, so it was either a long detour to go around, or get our feet wet
A little bit of everything on this route: some singletrack, some road, some gravel.
Germany was such a bike friendly country! We loved it!

The iPhone has it’s place in my photography kit, and for certain uses, it may be the right tool for the job.

Riding out of Munich in the early morning