Great Rides – New Zealand, Part 2

Sunrise, Ghost Lake Hut, Old Ghost Road

Dark skies lay ahead of us on the drive up to Murchison for the Start of The Old Ghost Road. A check with the weather forecast revealed a cold front rolling in from the west. Rather than ride in the cold and wet with no views, we opted to postpone our reservation for the Old Ghost Road huts and car shuttle. Fortunately, we were allowed to do both, with some penalty in cost.

Hot Springs, St James’s Cycleway

After a night in Murchison, we turned east and headed to Hanmer Springs, away from the weather.

The Skyline Steps, Old Ghost Road

It turned out to be a good decision. The weather was great in Hanmer Springs, and we spent 2 nights there. We rode the local trails on the first day, and then the St. James Cycleway to a hot spring on the second day.

Tip: Try the lamb at Number 31 restaurant in Hanmer Springs

Getting dinner ready, Ghost Lake Hut, Old Ghost Road

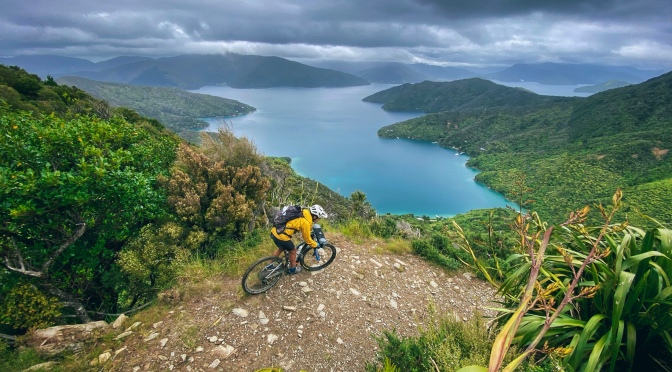
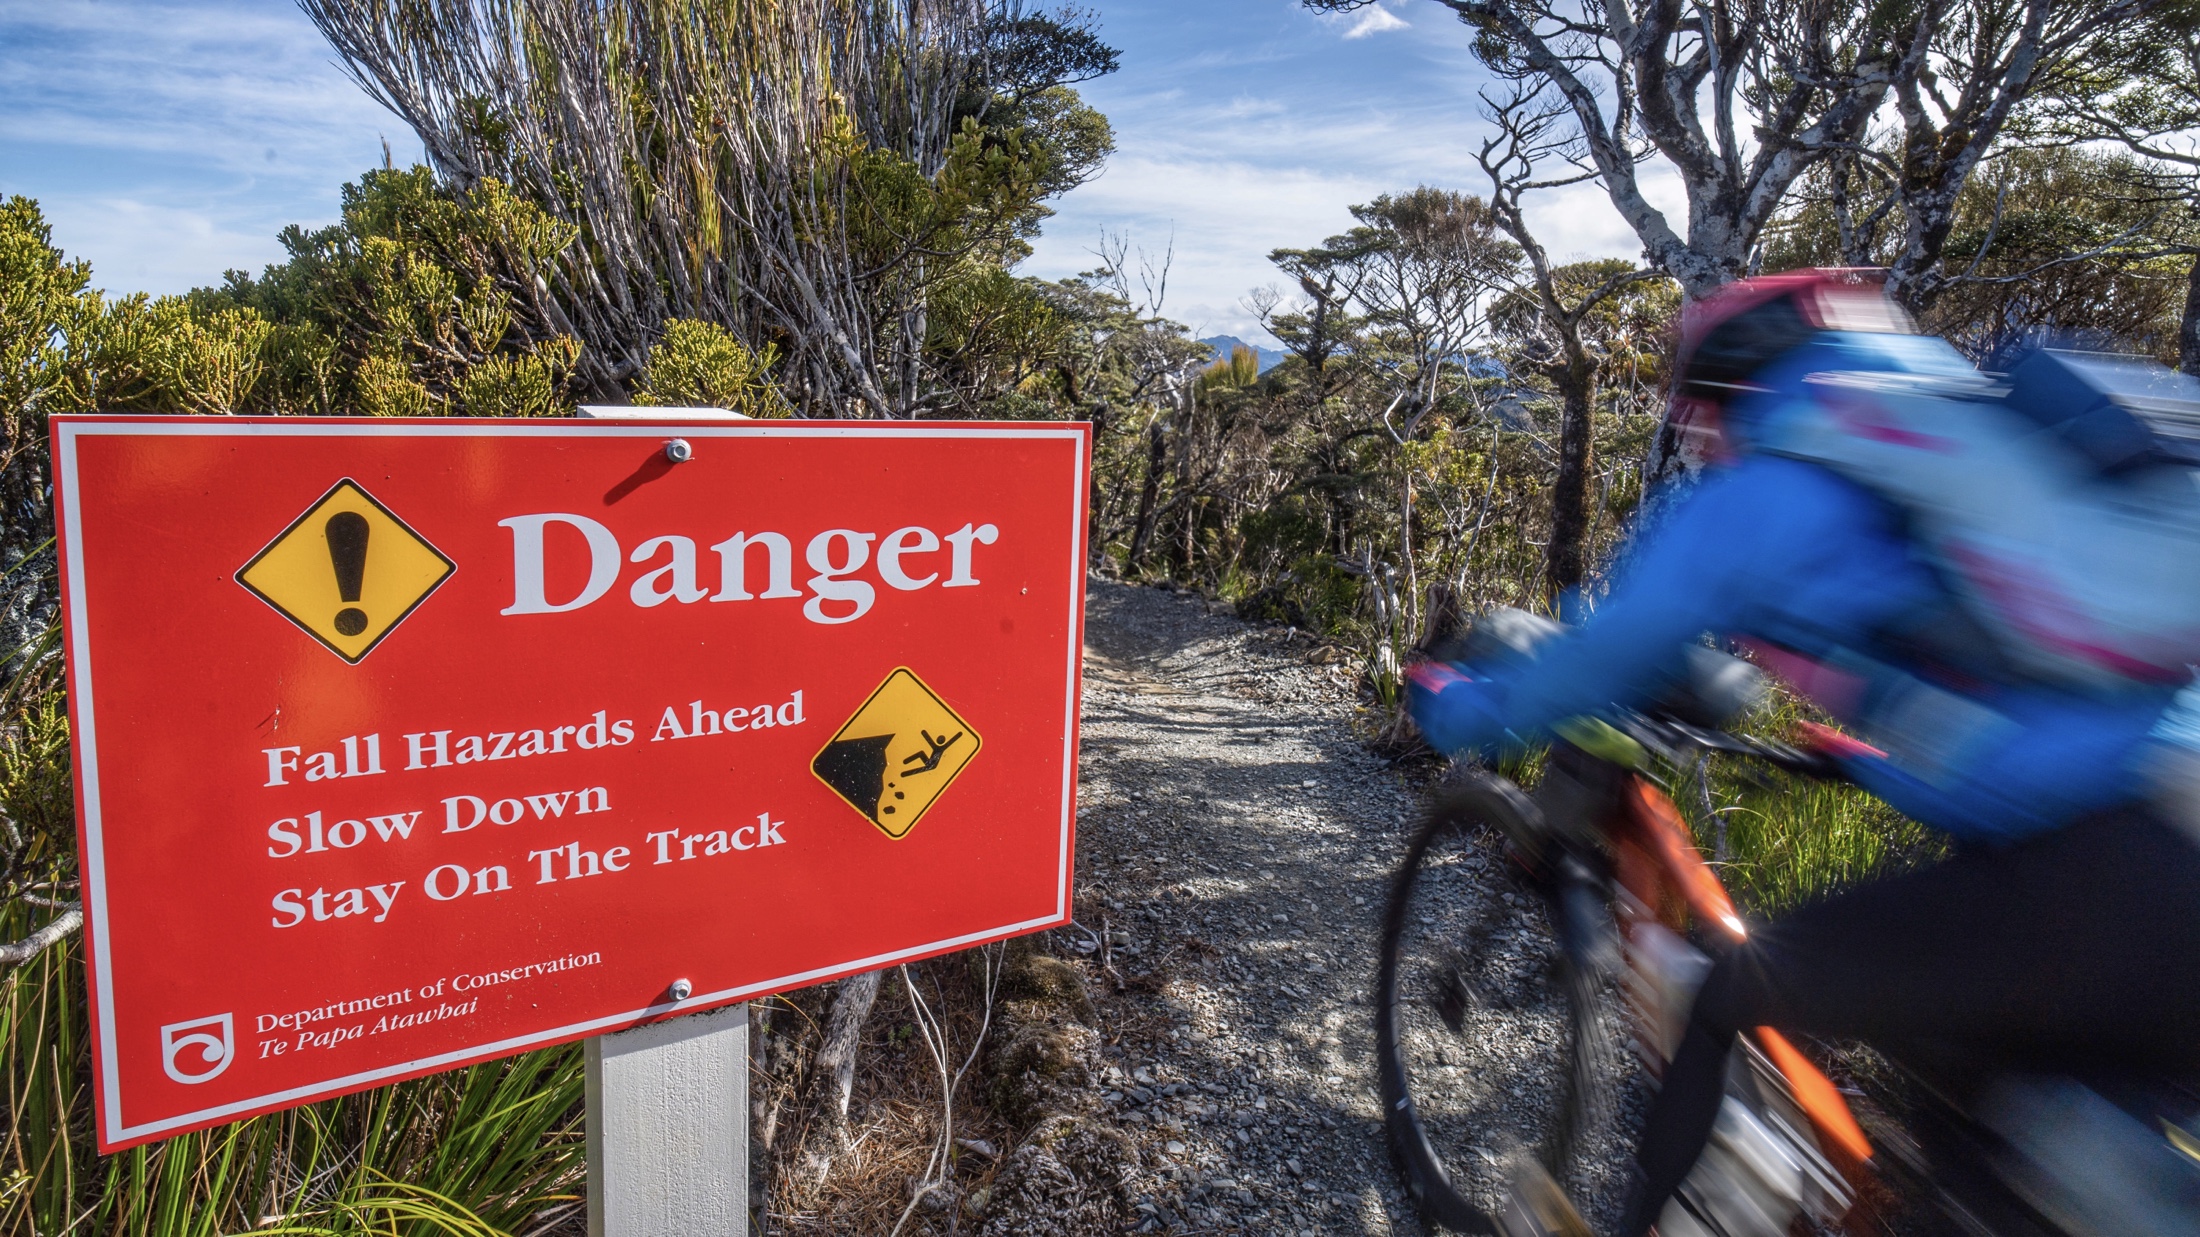
When we returned to start The Old Ghost Road, we had great weather as well, so the decision and cost to postphone our start was well worth it. We began our ride up through old forests, littered with interesting bits of mining paraphernalia, across high alpine ridges and passes, and finally out through a narrow river gorge. The scenery was both varied and stunning. Mix that in with interesting riding, including having to carry our bikes down 200 narrow and steep steps, and you have the formula for the best of all the long trails we rode in NZ. If you only have time to ride one long trail in NZ, this one is probably it!

Riding The Old Ghost Road

We rode the OGR over 3 days, and spent 2 nights in the huts. The first night at Ghost Lake Hut was completely empty, except for us, but the following night at Specimen Point Hut was completely full. We were the only bikers, with the rest being hikers.

Suspension Bridge along the Mokihinui River, Old Ghost Road

Our 3rd day was a short ride out through the narrow, but scenic, Mokihinui River gorge, getting to our car that had been shuttled up at about 10am.

Riding out along the Mokihinui River, Old Ghost Road. 📸 Laura Liong

We spend the next week or so riding in and around Queenstown. Our last visit to Queenstown was some 30 years ago, on our honeymoon, and a lot has changed. For one thing, its a lot more crowded, and so we based ourselves just outside of downtown Queenstown in Frankton. Frankton has its own restaurants and stores, so we didn’t feel the need to go downtown that often.

Tip: Try the Brisket at the Meat Preachers, Frankton.

Welcome Rock Trail, Queenstown

We spent our last week in NZ riding a few more Great Ride Trails around Queenstown. The Coronet Loop was Awesome! I’d say it was the best one day ride we did in NZ. The Queenstown Trail was a bit overgrown, with some detours. Welcome Rock wasn’t bad, but the climb up to the start was pretty big, and I woudn’t do this again unless I had a 4-wheel drive vehicle that could drive up to the start of the trail. The Lake Dunstan Trail was a nice rest day ride.

Navigating through Thistle on the Coronet Loop. 📸 Laura Liong

Then, it was a long drive back to Christchurch to the motel where we kept our bike bags, for our last night before flying home.

Tip: Consider flying into Queenstown instead. Queenstown is a little more central, and a little closer to more of the Great Rides.

Swooping Singletrack on the Coronet Loop

Photography Notes

My main setup is the compact and lightweight full-frame Sony a7c with the sony 28-60mm kit lens, and a tiny Samyang 18mm lens. Occasionally, I would swop out the 28-60mm lens for a Samyang 75mmf/1.8 for a different look. The setup rides in lightweight pouches stuffed into my riding backpack, a 14l Mission Workshop Hauser. The Hauser is great because it’s so fast to access with the velcro top, and the backpack is rain and splash proof. Current prices for the Hauser are ridiculous, but they normally have a sale around Black Friday.

Lake Dunstan Trail

Bikes and Other Gear

We both used Specialized Epic Evos on this trip. We found them to be the perfect bike fo the longer trails. Light enough to pedal uphill, and capable enough to handle the decents. We use Apidura Backcountry series bikepacking saddle and handlebar bags. They were tough and waterproof, I liked their Downtube Pack for my spares. I stowed 2 tubes, extra sealant, brake pads, derailuer hanger, spare valve, etc in there and strapped it to the bottom of my down tube, which was a good place for it as it was pretty heavy. It was bomber. It stayed put and stayed dry.

Riding Dean’s Bank, a local trail at Wanaka, near Queenstown.

There are more trip photos on my Instagram.

Please comment below if you have any questions. Thank you!

Great Rides – New Zealand, Part 1

Me on the Heaphy Track. Photo by Laura

At the end of November last year, Laura and I took a month long trip to New Zealand, with a plan to ride as many of New Zealand’s Great Rides as we could in a month, returning home just before Christmas. We used the Great Rides App to help with the planning. There is also a book, The New Zealand Cycle Trails, which we didn’t have at the time, but could be useful.

Elevated singletrack, Heaphy Track.

Logistics were a little complicated, as certain rides, namely the Heaphy Track and Queen Charlotte Track, could only be ridden during certain times of the year, typically the off season, as those tracks are shared with hikers. We had planned to ride them on the last few dayswhere bikes were allowed on the track. Also, most tracks are one way, not loops, so arrangements need to be made for transport. On top of that, there’s the slightly unpredictable weather, especially during the shoulder season. We rented an MPV for the month that could transport us and our bikes, and give us the flexibilty to maximise our time there. A tip is to bring a graoundsheet (we used a sheet of Tyvek) to line the floor and seats of the vehicle as they require the vehicles to be returned clean.

Lots of space in this vehicle and we probably could have rented a smaller SUV instead.

We picked up our rental car from Christchurch Airport (although if we were going to do this again, I would choose to fly into Queenstown instead), stayed the night at an motel, assembled our bikes and stored our bike bags at the motel for our return a month later. Then drove out the next day for Nelson.

Which way to go? Queen Charlotte Track.

Our first ride was the Heaphy Track. From Nelson, we drove 2 hours to the trailhead. Because a bridge was out on the far end, we made it a 3 day out and back, which made it a little easier, transport wise. It would have been nice to have been able ride all the way through, but we enjoyed it, and got to chat with the few bikers and hikers that were also on the trail with us.

A Weka: a kind of prehistoric chicken that tries to steal anything it can carry from unaware bikers.

We opted to stay in huts managed by the DOC (Department of Conservation), which meant a lighter load (no need to carry a tent, stove and mattress), but also meant that we had to prebook the huts ahead of time.

Scenery on the Queen Charlotte Track. Photo by Laura Liong.

Our second ride was the Queen Charlotte Track. The ferry dropped us off at Ship Cove, on the last day bikes were allowed on the track there. This is a more luxurious ride, as we spent our 2 nights on trail in hotels and ate food from restaurants. Actually, this would have been a great starter ride. We got pick up by a ferry (prebooked) at Anakiwa, at the other end of the track, which took us back to the car at Picton.

Tip: Try the fish and chips at Paperfish in Picton!

Tree Ferns on the Queen Charlotte Track

We spent 2 nights in Picton, the night before and the night after completing the QCT. After refueling with Take-out Fish and Chips, we drove to Nelson for 2 nights, riding the Coppermine Trail (not to be missed). Then, resupplyed with bikepacking food before heading off to Punakaiki for the start of the Paparoa Track.

Tip: Try the Whitebait Fritters (seasonal) from the Punakaiki Beach Campground!

A convenient picnic table makes a great lunch stop on The Queen Charlotte Track

The Paparoa Track is one of the more popular Great Rides, and we had booked our huts about 6 months ahead of time. We spent 1 night in a hut, and it was pretty full. The Track itself is 52km long, so it can be done in a long day. That’s what I would do if we were to ride this again. Doing it in a day means not having to prebook a hut, but also means less time to stop for photos.

In the high country, Paparoa Track

New Zealand’s landscape appears compressed, both in terms of distance, as well as in elevation. This means that travelling a little ways inland reveals very different scenery. Elevation wise, a change of a thousand meters (3000’) can take you from old growth forests into the high alpine country. This means a lot of variety in the vegetation, geography and scenery in short ride.

Flowy singletrack through a mossy forest, Paparoa Track.

This compressed landscape scenery is apparent in the Paparoa Track. We left our car at the Punakaiki Beach Campground and took a shuttle to the start of the Trail. A couple of hours climbing through an old growth mossy forest and we were up in windswept alpine country, and the next day, we exited the trail and were back at sea level, riding along the shore back to the car.

Trail going under a tree, Paparoa Track

With 2 Great Rides under our belts, we had gotten our trail legs. Our next Great Ride was going to be one of the oldest and best known rides, the Old Ghost Road, but as we drove out of Punakaiki and headed towards Murchison, near the start of the Old Ghost Road, the skys ahead turned dark with incoming weather.

Trail Signage, Paparoa Track